Search

Håvard Siegel Haukeberg

Paste life: Ctrl+C -> Ctrl+V

Putting Pictures in your App

This is how you add and use pictures in Your App:

1. Find
2. Save Locally
3. Create a folder in Visual Studio
4. Import into Visual Studio
5. Put Picture in objects

—FINDING PICTURES—
Just bing them

—SAVE LOCALLY—
Your Pictures need to be saved in a temporary folder and this folder has no Connection to the App

—CREATE FOLDER IN VISUAL STUDIO—
image
Notice the folder structure in this App. ALWAYS put folders in the Assets folder (makes it easier)
Right click on Assets to create more folders.

—IMPORT INTO VISUAL STUDIO—
Single Click on the folder you want the picture to be in (here i clicked on Assets)
Then Drag and Drop the picture from your folder to the folder in Visual Studio.
image

—PUT PICTURE ON OBJECTS—
Click on SplitPage.xaml to load the designer
image
Click the Object you want to fill with a picture (Here i clicked on the background):
image

Now, in the properties windows select BRUSH and Click the IMAGE BUTTON (you might have to resize the right bar to see the image source button)
image

Click on the ImageSource arrow down
image

Your picture is now visible and it should cover the entire background of the app.
notice that once you dragged the image into the assets folder in Visual Studio, you also move the image file to a different folder on the disk. You may delete the orginal picture in your temporary folder.

Changing Sample Data in Split Page App

—I do not know how to Write Code—

Then let me Present Fugleboka:

Split Page app for WIndows 8
Split Page app for Windows 8

Split Page app works well when you have Several Groups (Bird Categories) and Birds (Category-Items)
Check it out here: http://apps.microsoft.com/windows/nb-no/app/fugleboka/e1e04b69-4980-475f-a970-a8e770a080b0
CREDS to @digitaldias for helping out with the code which enables sound

—THIS MUST BE ONE OF THE EASIEST APP TO MAKE—

CREATE TEMPLATE
————————————

This is how you create Your Split Page app by just replacing code.

1. Run Visual Studio – New Project
image
2. Select C# (does not really matter, you will not write code anyhow)
image
3. Give your app a name
image
4. Click Ok

Now you have actually created all that is needed for the app in terms of code. If you press run, the app will start. Remember, never mess with app name or solution name. Give it one name and stick with it.

FIND MATERIALS
————————————
Following need to be replaced:
Group Pictures (Bird category) USE BING
Item Pictures (Birds) – USE BING
App Logo – USE BING AND PAINT
Information about the bird – USE BING
Capabilities and Language – JUST FOLLOW MY GUIDE

GROUP PICTURES
————————————
Navigate to the SampleDataSource.cs and find this code in your sample app, about line 262
image
Find this text and start to replace it:
image
Like this:
image
Run the project to see your results:
image
Include a picture in the asset folder by dragging and dropping a picture from a folder on your computer to the “Asset” folder in the Solution Explorer

Then refer to that picture in the code like this:
image (remember to check if its a .jpg or .png)

ITEM PICTURES
————————————
Go about the same way for individual items.
find this code:
image
Create your first bird, e.g. Vampirebat (always use one word, no spaces or special characters)
image
Notice here that I have changed ITEM_CONTENT to VAMPIREBAT this word now refers to a string a little further up. It is in this string that you write in depth information about the Vampire Bat. As is now, the code will not run. Find this string now:
image
Now, add the similar string VAMPIREBAT do not remove the ITEM_CONTENT since all the “empty templates” require this string.
image (Run code and click on bats)

Notice the repetition,
image
Further above in the VAMPIREBAT string you see a lot of \n
\n = breaks the line
\n\n = a new line and a space between
{0} = means the content of the first line

INFORMATION ABOUT BIRD
————————————
Find a website with info, e.g. Wikipedia.com, copy a paragraph and paste it here:
image
Find an other paragraph and adjust the string as in the picture, then run the code.

image (Notice that the “About vampire bat” text overlaps the sentence of fact 1.)
This can all be fixed with adding some extra \n like this:
image (Notice also how i have entered static information into the string)
RUN CODE:
image
NOW, see the pattern? Start Coding and replace all the categories and content.

FUGLEBOKA:

APP LOGO
————————————
Find a Picture for your app, preferably a white background With a logo in the center and best to use a square picture.
If you want to change the app logo when you start the app go to Assets in Solution Explorer and find the files there. Notice you want to change the colors and content off all these files by opening in Paint and copy pasting from Bing. WARNING: DO NOT CHANGE SIZE, keep the file size to the same e.g. 30×30 or 50×50. If you mess that up, the app wont run.
image (notice that submission in the store require you to change all but LightGray & DarkGray)

CAPABILITIES AND LANGUAGE
————————————
Before you can submit your app, there are two things to make sure you have entered correctly.

Find this in your solution explorer:
image
Under language make sure it reflect language you write information in or your app will not pass certification

image (No-nb for Norwegian apps)

Select Capabilities and UNCHECK everything or your app will not pass certification
image

SUBMIT IT!

2 other apps created this way:
SOPPBOKA: http://apps.microsoft.com/windows/nb-NO/app/11298cb2-508f-4315-85bf-97c6ea809666
FISKEBOKA: http://apps.microsoft.com/windows/nb-no/app/fiskeboka/b9eb2441-ee6d-4c62-bcc1-0e16075f4767

Allow weak password in Office 365

This is how you can remove the need for strong password / complex passwords in Office 365 using PowerShell.

  • First, Connect to Office 365, type; Connect-MsolService
  • Second, Open Office 365 module, type; get-module MSOnline
  • Third, type; get-MSOLUser | Set-MsolUser -StrongPasswordRequired $false

Perfect for Education, Schools, Old folks, kids etc…

#Office365

Installing #Windows8 Enterprise on #Surface PRO

Note that Windows 7 USB/DVD (Microsoft store) Download Tool doesn’t seem to properly prepare the USB flash drive for UEFI booting.
Requirements

4 Gb USB stick/flash drive

Windows 8 Enterprise Installation files (either their own image or from the Volume Licensing website)

Windows 8 PRO running on a Surface Pro device

Make a bootable USB flash drive using DISKPART

Run CMD.EXE as an administrator (Win-X then A), then run DISKPART with the following commands (not case-sensitive):

Command What it does
LIST DISK                 Shows all mounted disks.  Find your USB flash
SELECT DISK n          Selects the disk that future commands will use.  Replace ‘n’ with the disk # for your USB flash drive.

NOTE:  Be careful that you don’t select your hard disk!  The next command will wipe the selected drive clean.

CLEAN Erases all previous partition & volume information on the flash drive.
CREATE PARTITION PRIMARY    Partitions the flash drive as one partition for the whole drive.
SELECT PARTITION 1          Selects the new partition so future commands will operate on it.
ACTIVE                    Marks the new partition as active so the BIOS/UEFI can boot to it.
FORMAT FS=FAT32  QUICK        Formats the partition as FAT32.

(NOT NTFS!)  EXTREMELY IMPORTANT!

ASSIGN                   Assigns a drive letter to the flash drive.
EXIT                        Exits DISKPART

At this point your USB drive is formatted.  DO NOT format the drive with Windows Explorer or format.com; you will not be able to boot from it.

Copy files to the USB Drive and Prep Disk

Copy the Windows 8 Enterprise Image files to the USB drive (use XCOPY or ROBOCOPY) both of which are available in Windows 7/8.

robocopy <source directory> <usb flash drive root directory> /mir

Example:  robocopy d:\Win8Files e:\ /mir
(Change the destination to the folder that you have extracted Windows image on disk)

cd boot
bootsect /nt60 X: (X is the drive latter of your USB drive )

OPTIONAL, if you do not have USB Ethernet cable – Add the Wireless Network Card driver

Download Marvell AVASTAR 350N driver from Windows Update Cataloghttp://catalog.update.microsoft.com/v7/site/home.aspx

Double Click .cab file and copy contents to a directory on the USB stick

Copy c:\windows\system32\driverstore\surfaceaccessorydevice.inf_amd64_74faf8b2bdd32b88 directory to the flash drive

Boot off USB driveGet into UEFI setup screen

Shutdown Microsoft Surface PRO

Hold volume up and press power, keeping volume up held down

Click Secure Boot, then click disable

Boot into Windows 8 on Surface

Insert USB stick into Microsoft Surface PRO

Press Windows Key + R

Enter : shutdown.exe /r /o /f /t 00

After the system restarts – Click boot from another device

Select USB device

Install Windows 8

Go through normal Windows 8 Enterprise setup

OPTIONAL – Add the Wireless Network Card to the System

Open device manager

Right Click Marvell Wireless Device – select update driver software

Choose “Browse my computer for Software”

Browse or enter path for the directory on the USB where you put the network driver

Right click the Unknown Device – select update driver software

Choose “Browse my computer for Software”

Browse or enter path for the directory on the USB where you put the surfaceaccessorydevice driver

Finishing up

Join your wireless network and run Windows Update

Right click the last question mark device – select update driver software

Click automatically install driver, it will find it online

Go back into the BIOS / UEFI and re-enable secure boot

Congratulations! – You are running Windows Enterprise on your Surface PRO


Add #LiveID(Microsoft Account) to any existing email

Yes, you read right!
You may use any existing email and simply add Microsoft credentials to that account.
The Microsoft Account gives you access a bunch of features such as:
http://skydrive.com
http://outlook.com
http://xbox.com
Windows 8 Sync of settings
Windows 8 Store

+++

Step 1

Navigate here: http://skydrive.com

Step 2

Click link there

Takes you Here

Step 3

Where it says

“Navn på Microsoft-Konto”
Enter any email like

private@applecloud.com
private@gmail.com
private@yourdomain.com
student@office365domain.com
jobemail@yourcompany.com

Step 4

Confirm your email

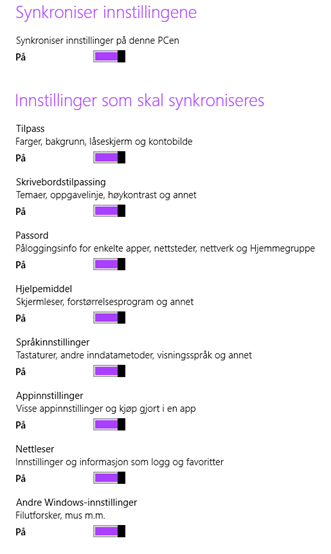
Now you can enjoy all the features mentioned above including these features in Windows 8 found under
Settings->Change PC settings->Synchronize settings

Ny skolepc? #Slates #hybrid-pc #tablets #Pads #Win8

Making #Office365 grandfather friendly, the password never expires

#Office365

Turning of the automatic 90 day password change for Office 365. Making the service easy to use for the forgetful family members.

Note: Windows 8 comes with a Power Shell instance. Don’t use it here. Use the one provided from below.

First; Install logon assistant for Office 365 Power Shell

First install the respective 32/64 bit login assistant

http://www.microsoft.com/en-us/download/confirmation.aspx?id=39267

Then install the respective 32/64 bit Power Shell version

Microsoft Online Services-modul for Windows PowerShell (32-biters versjon)

Microsoft Online Services-modul for Windows PowerShell (64-biters versjon))

Second; Run Power Shell Window

Click Windows Key, and find by scrolling or typing; Azure. Click on Windows Azure Active Directory Module for Windows Power Shell

Now, lets turn off password expiration for all users.

  • First, Connect to Office 365; Connect-MsolService
  • When in the Power Shell window, type; get-module MSOnline
  • Then type; Get-MSOLUser | Set-MsolUser -PasswordNeverExpires $true

Full links here:

NOR:
http://onlinehelp.microsoft.com/nb-no/office365-enterprises/hh534387.aspx

ENG:
http://onlinehelp.microsoft.com/en-us/office365-enterprises/hh534387.aspx

Files to install: (NOR)
http://onlinehelp.microsoft.com/nb-no/office365-enterprises/2b09b6a8-ad7e-446f-b7f0-273856beed70#BKMK_install

Hope this helps

#newoffice

Windows To Go VS Windows 8

Windows To Go

Windows 8

Who is it for

Consultants; who receive one PC from each client to work on projects


Students; who only have access to a computer lab. Each student may receive 1 WTG instance and return it to the institution when no longer enrolled


Information Workers; who need access to LOB and domain off work.

Just about everyone

How do you get it

Windows To Go is a Windows 8 Pro Software Assurance benefit on Volume License agreement (Not Reail and OEM)


You need Windows 8 Enterprise image for the software bits, which is not available for other than VL customers


Retail (In a store), OEM (On a new computer) or VL (A Volume software agreement)


You need a Windows 8 Pro computer to create Windows To Go sticks. The software to create WTG is included in Windows 8 Pro, however the Image to populate WTG stick must be acquired from either CD, Technet, VLSC or MSDN etc..

How do you use it

Almost PC/Mac or Linux machine that can boot from USB

Almost any PC or Mac with Parallels/Bootcamp

What if there is no internet connection

Does not require internet

Does not require internet

What about security

Bitlocker Drive Encryption, Bitlocker Boot Protection

TPM, Bitlocker Encryption, Refreshing or Resetting windows, Windows Recovery Environment

What does not work

Store Disabled by default*

Internal disks are offline

Refresh/Reset Windows

Removal of USB (reinsert before 60 sec if removed or else possibility for data loss)

Minimum hardware requirements

How is it integrated with the operating system

Windows To Go is Based on Windows 8, so all the settings which are synced through your Microsoft Account will be downloaded once you enter your Microsoft ID.

The WTG instance will have to be set up just like a normal computer if a clean enterprise image is used.

How is it integrated with Office & Skydrive

You install Skydrive, Office and other Software just as usual. The software from the Host machine who created the USB stick does not follow. Windows To Go is Based on the Windows 8 Enterprise image (which IT can modify).

Operating System

Windows 8 Pro

Any


Click here to learn more about Windows To Go
http://blogs.msdn.com/b/hyperyash/archive/2012/08/15/enabling-windows-store-on-windows-to-go-machines.aspx

*Click here to learn more about Windows Store on Windows To Go
http://technet.microsoft.com/library/hh831833.aspx

Setting up Office 2013 for Windows Intune

It’s really easy to use Windows Intune for Office 2013 deployment.

Step 1: Just get the Windows 2013 Bits and extract them to a folder.

Step 2: Locate the config.xml in the folder proplusr.ww

Step 3: Open the file in Notepad and make it look something like this:

Full guide here: http://technet.microsoft.com/en-us/library/dd630736.aspx

<Configuration Product=”ProPlusr”>


<Display Level=”none” CompletionNotice=”no” SuppressModal=”yes”

AcceptEula=”yes” />


    <!– <Logging Type=”standard” Path=”%temp%” Template=”Microsoft Office

Professional Plus Setup(*).txt” /> –>


<USERNAME Value=”Windows Intune Deployed user” />


<COMPANYNAME Value=”Haukeberg” />


    <!– <INSTALLLOCATION Value=”%programfiles%\Microsoft Office” /> –>


    <!– <LIS CACHEACTION=”CacheOnly” /> –>


    <!– <LIS SOURCELIST=”\\server1\share\Office;\\server2\share\Office” />

–>


    <!– <DistributionPoint Location=”\\server\share\Office” /> –>


    <!– <OptionState Id=”OptionID” State=”absent” Children=”force” /> –>


<Setting Id=”SETUP_REBOOT” Value=”Never” />


<Setting Id=”REBOOT” Value=”ReallySuppress”/>

<PIDKEY Value=”INSERT YOUR MAK KEY HER, ONLY NUMBERS, NO DASH” />

<Setting Id=”AUTO_ACTIVATE” Value=”1″ />


    <!– <Command Path=”%windir%\system32\msiexec.exe” Args=”/i \\server

\share\my.msi” QuietArg=”/q” ChainPosition=”after” Execute=”install” /> –>


</Configuration>


Now, just upload it to Windows Intune and remember to check the box (include all files in the current folder)

Blog at WordPress.com.

Up ↑