![]()

If you have Office 365 at work or personal and you use the 365 services on the web often you can input your credentials in Windows 10 and have Windows sign you in automatically.
Here is how to:


![]()
If you have Office 365 at work or personal and you use the 365 services on the web often you can input your credentials in Windows 10 and have Windows sign you in automatically.
Here is how to:
![]()
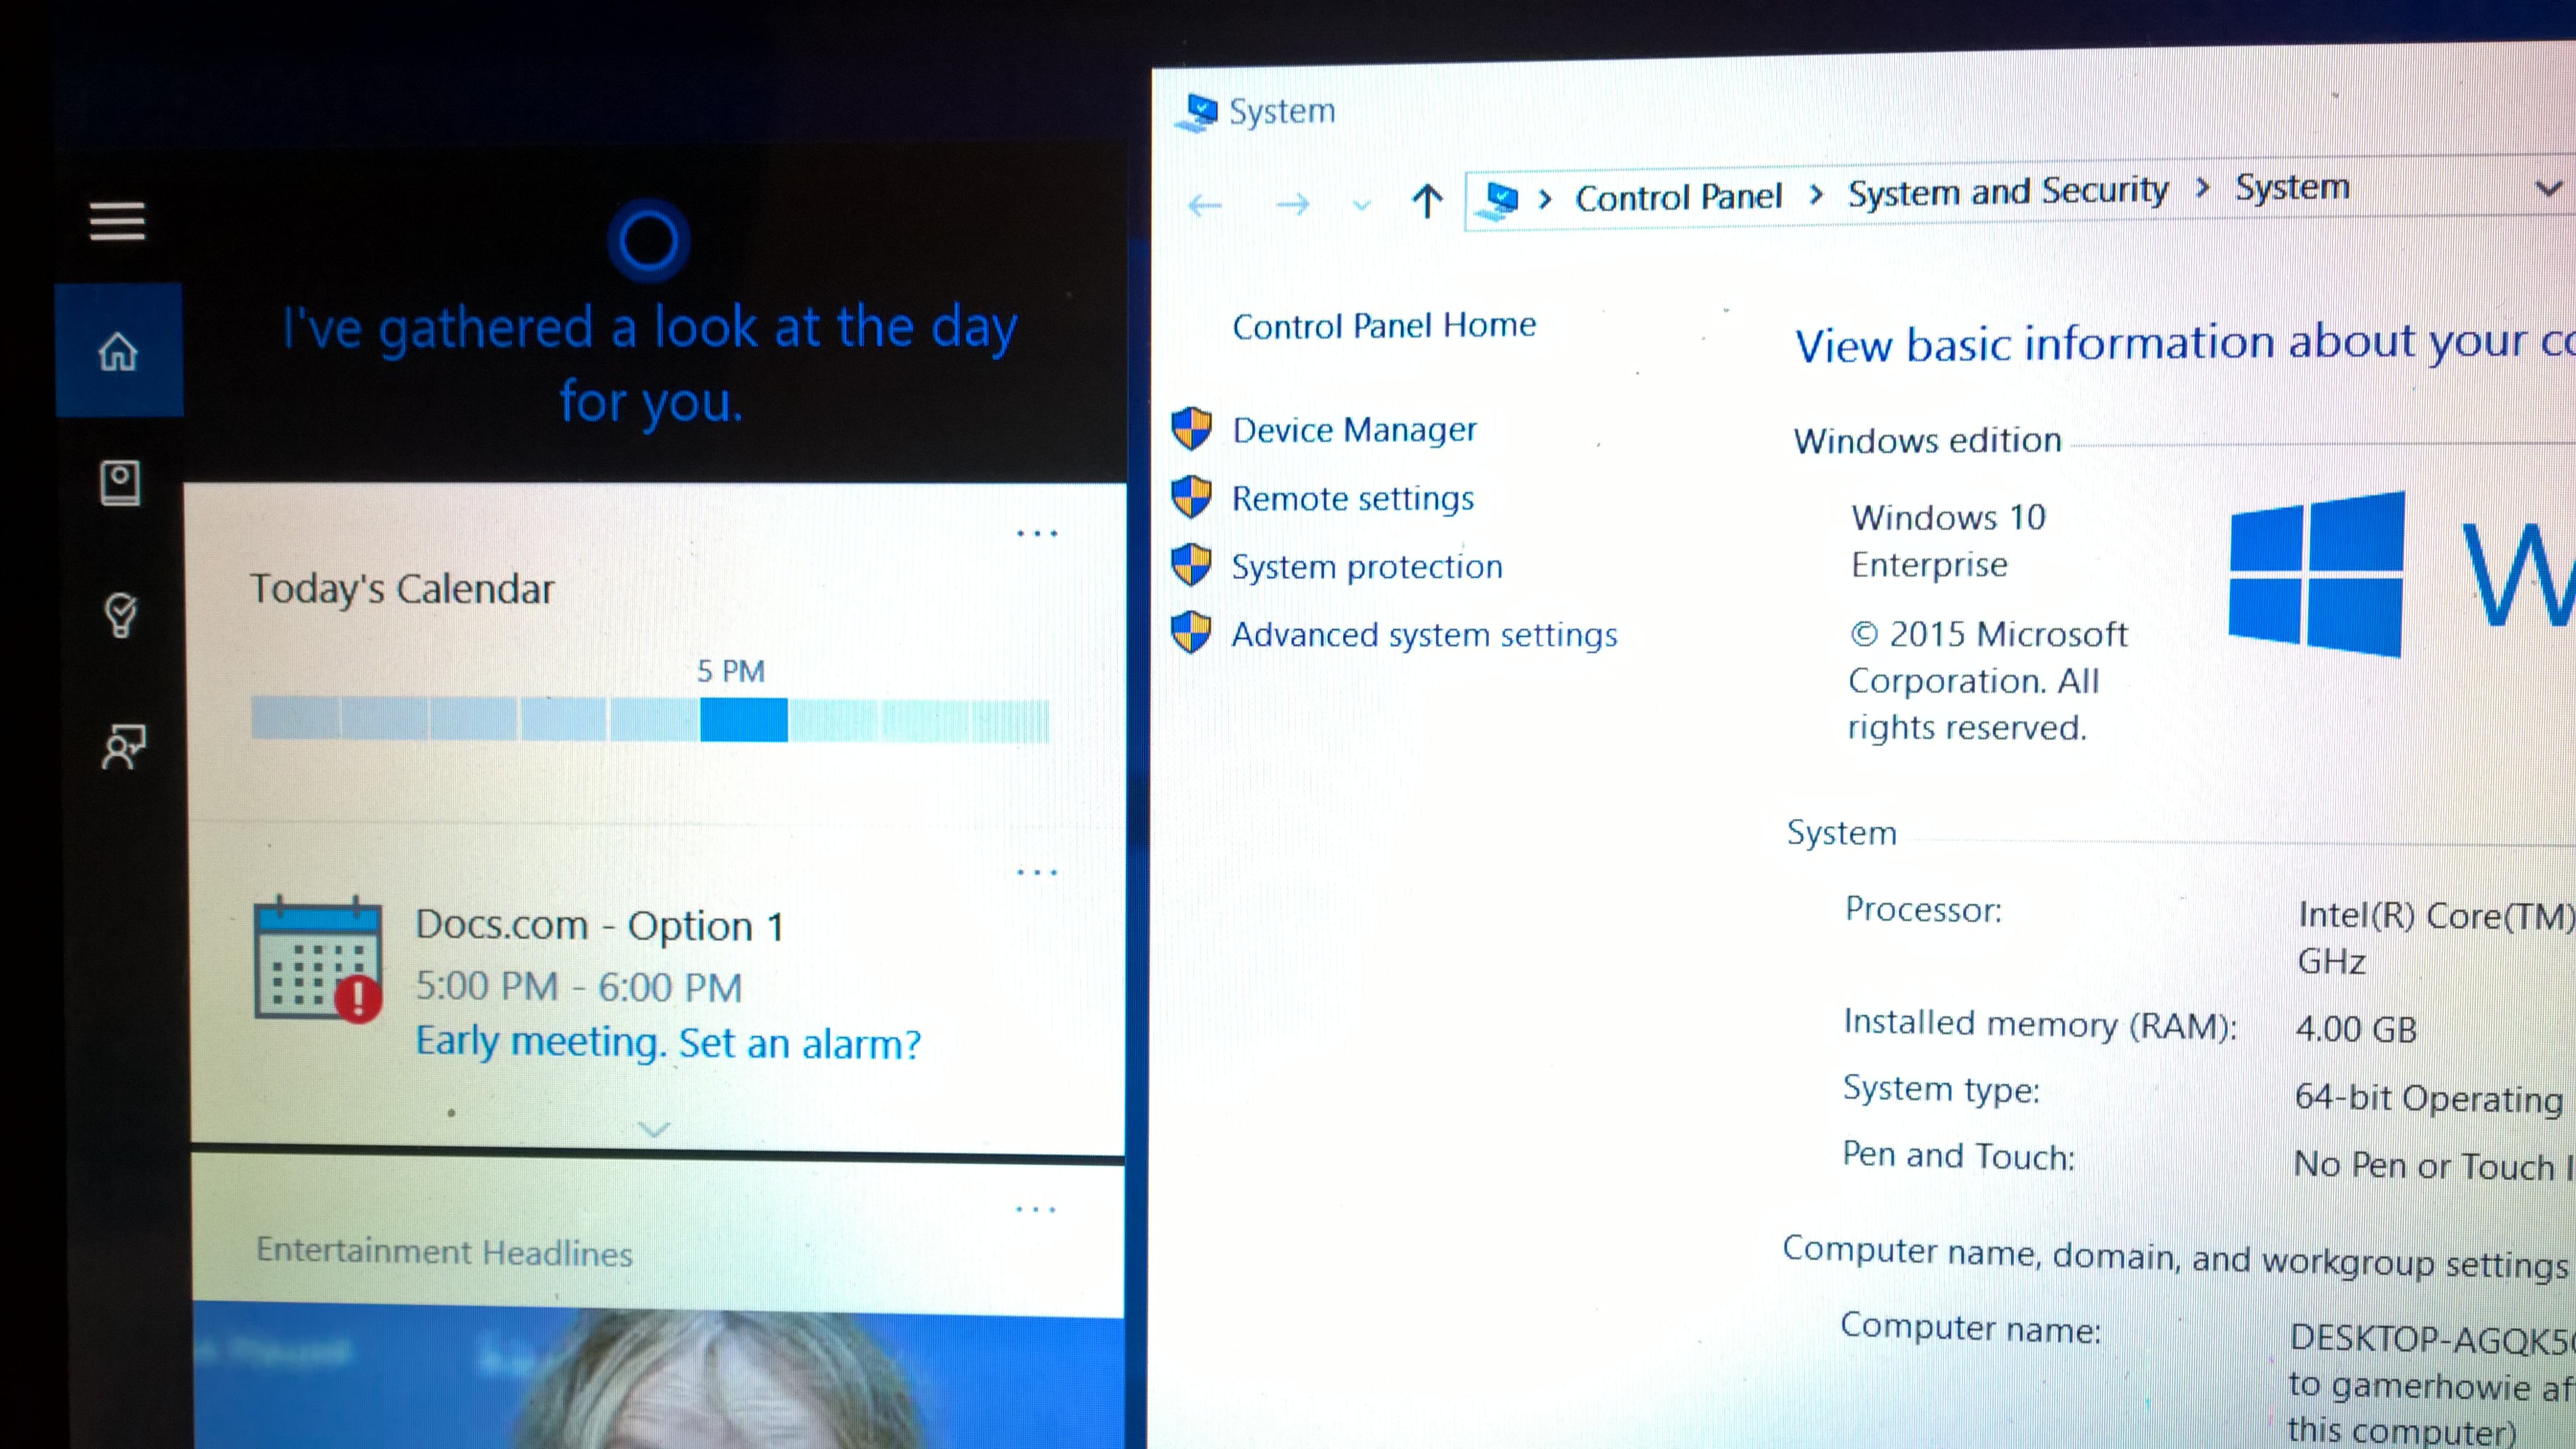
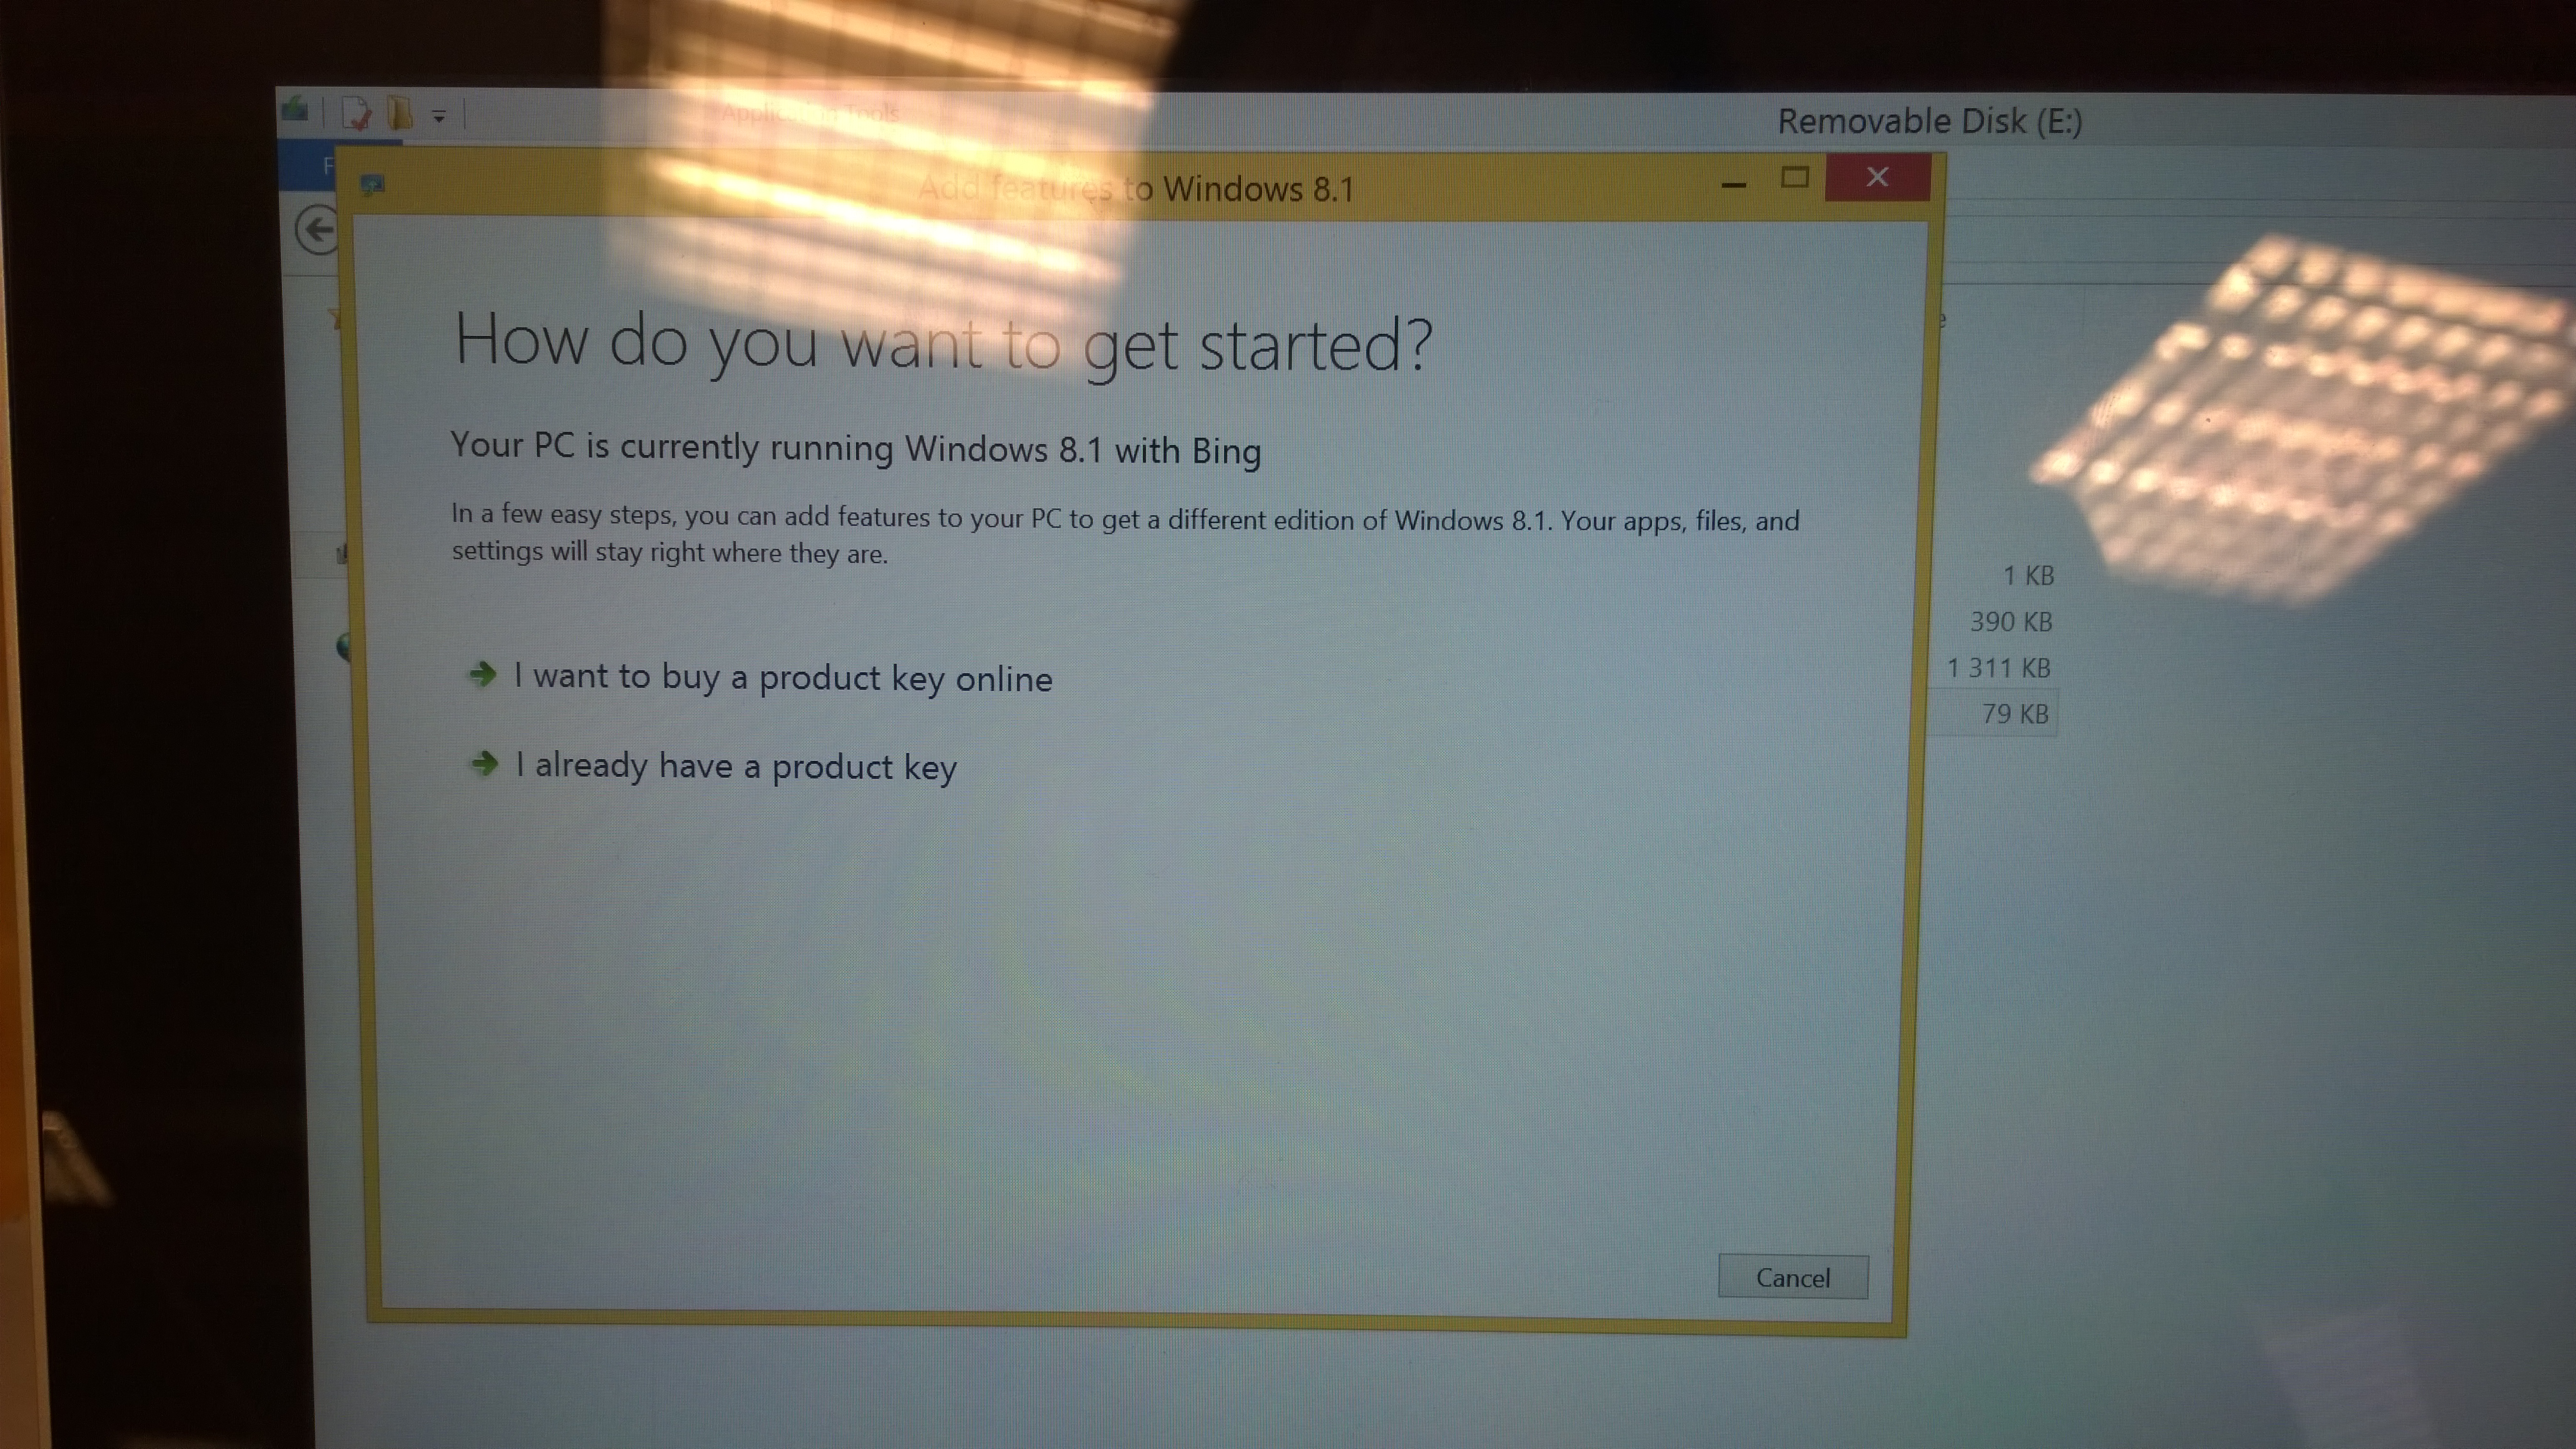
Testing the Windows 10 Enterprise image from MSDN or VLSC?
If Your machine is not domain-joined or you do not have a KMS server, you can activate Your enterprise installation With a MAK-key. This is usually if you have a MSDN or VLSC account.
Activation it easy:<
Press:
Win key
Type:
CMD
Right Click on Command Promt and Select “Run As Administrator”
Then type:
slmgr.vbs /ipk <windows key>
Your machine is now activated and configured as a KMS (Key Management Service) host

![]()
Install correct Language:
For all MSDN & VLSC users out there, if you want to make use of Cortana remember to install US-English version or another supported language of Windows 10. If you do not do that, there is no way to enable Cortana at the moment.
Don’t change default language
Install in with default keyboard, language. Just leave everything to default.
Don’t log in with a Microsoft Account Yet
It seems that if you log in with your MSA/Azure AD account even on a supported language Cortana will be disabled because your Azure AD or MSA might have regional settings.
Choose “Join a domain”

Run Cortana
She will prompt you to log in with your Microsoft Account, that’s okay now
Activate Windows
Do it.
Connect your Microsoft Account
Then connect your MSA and log in/out
You can now use Cortana
![]()
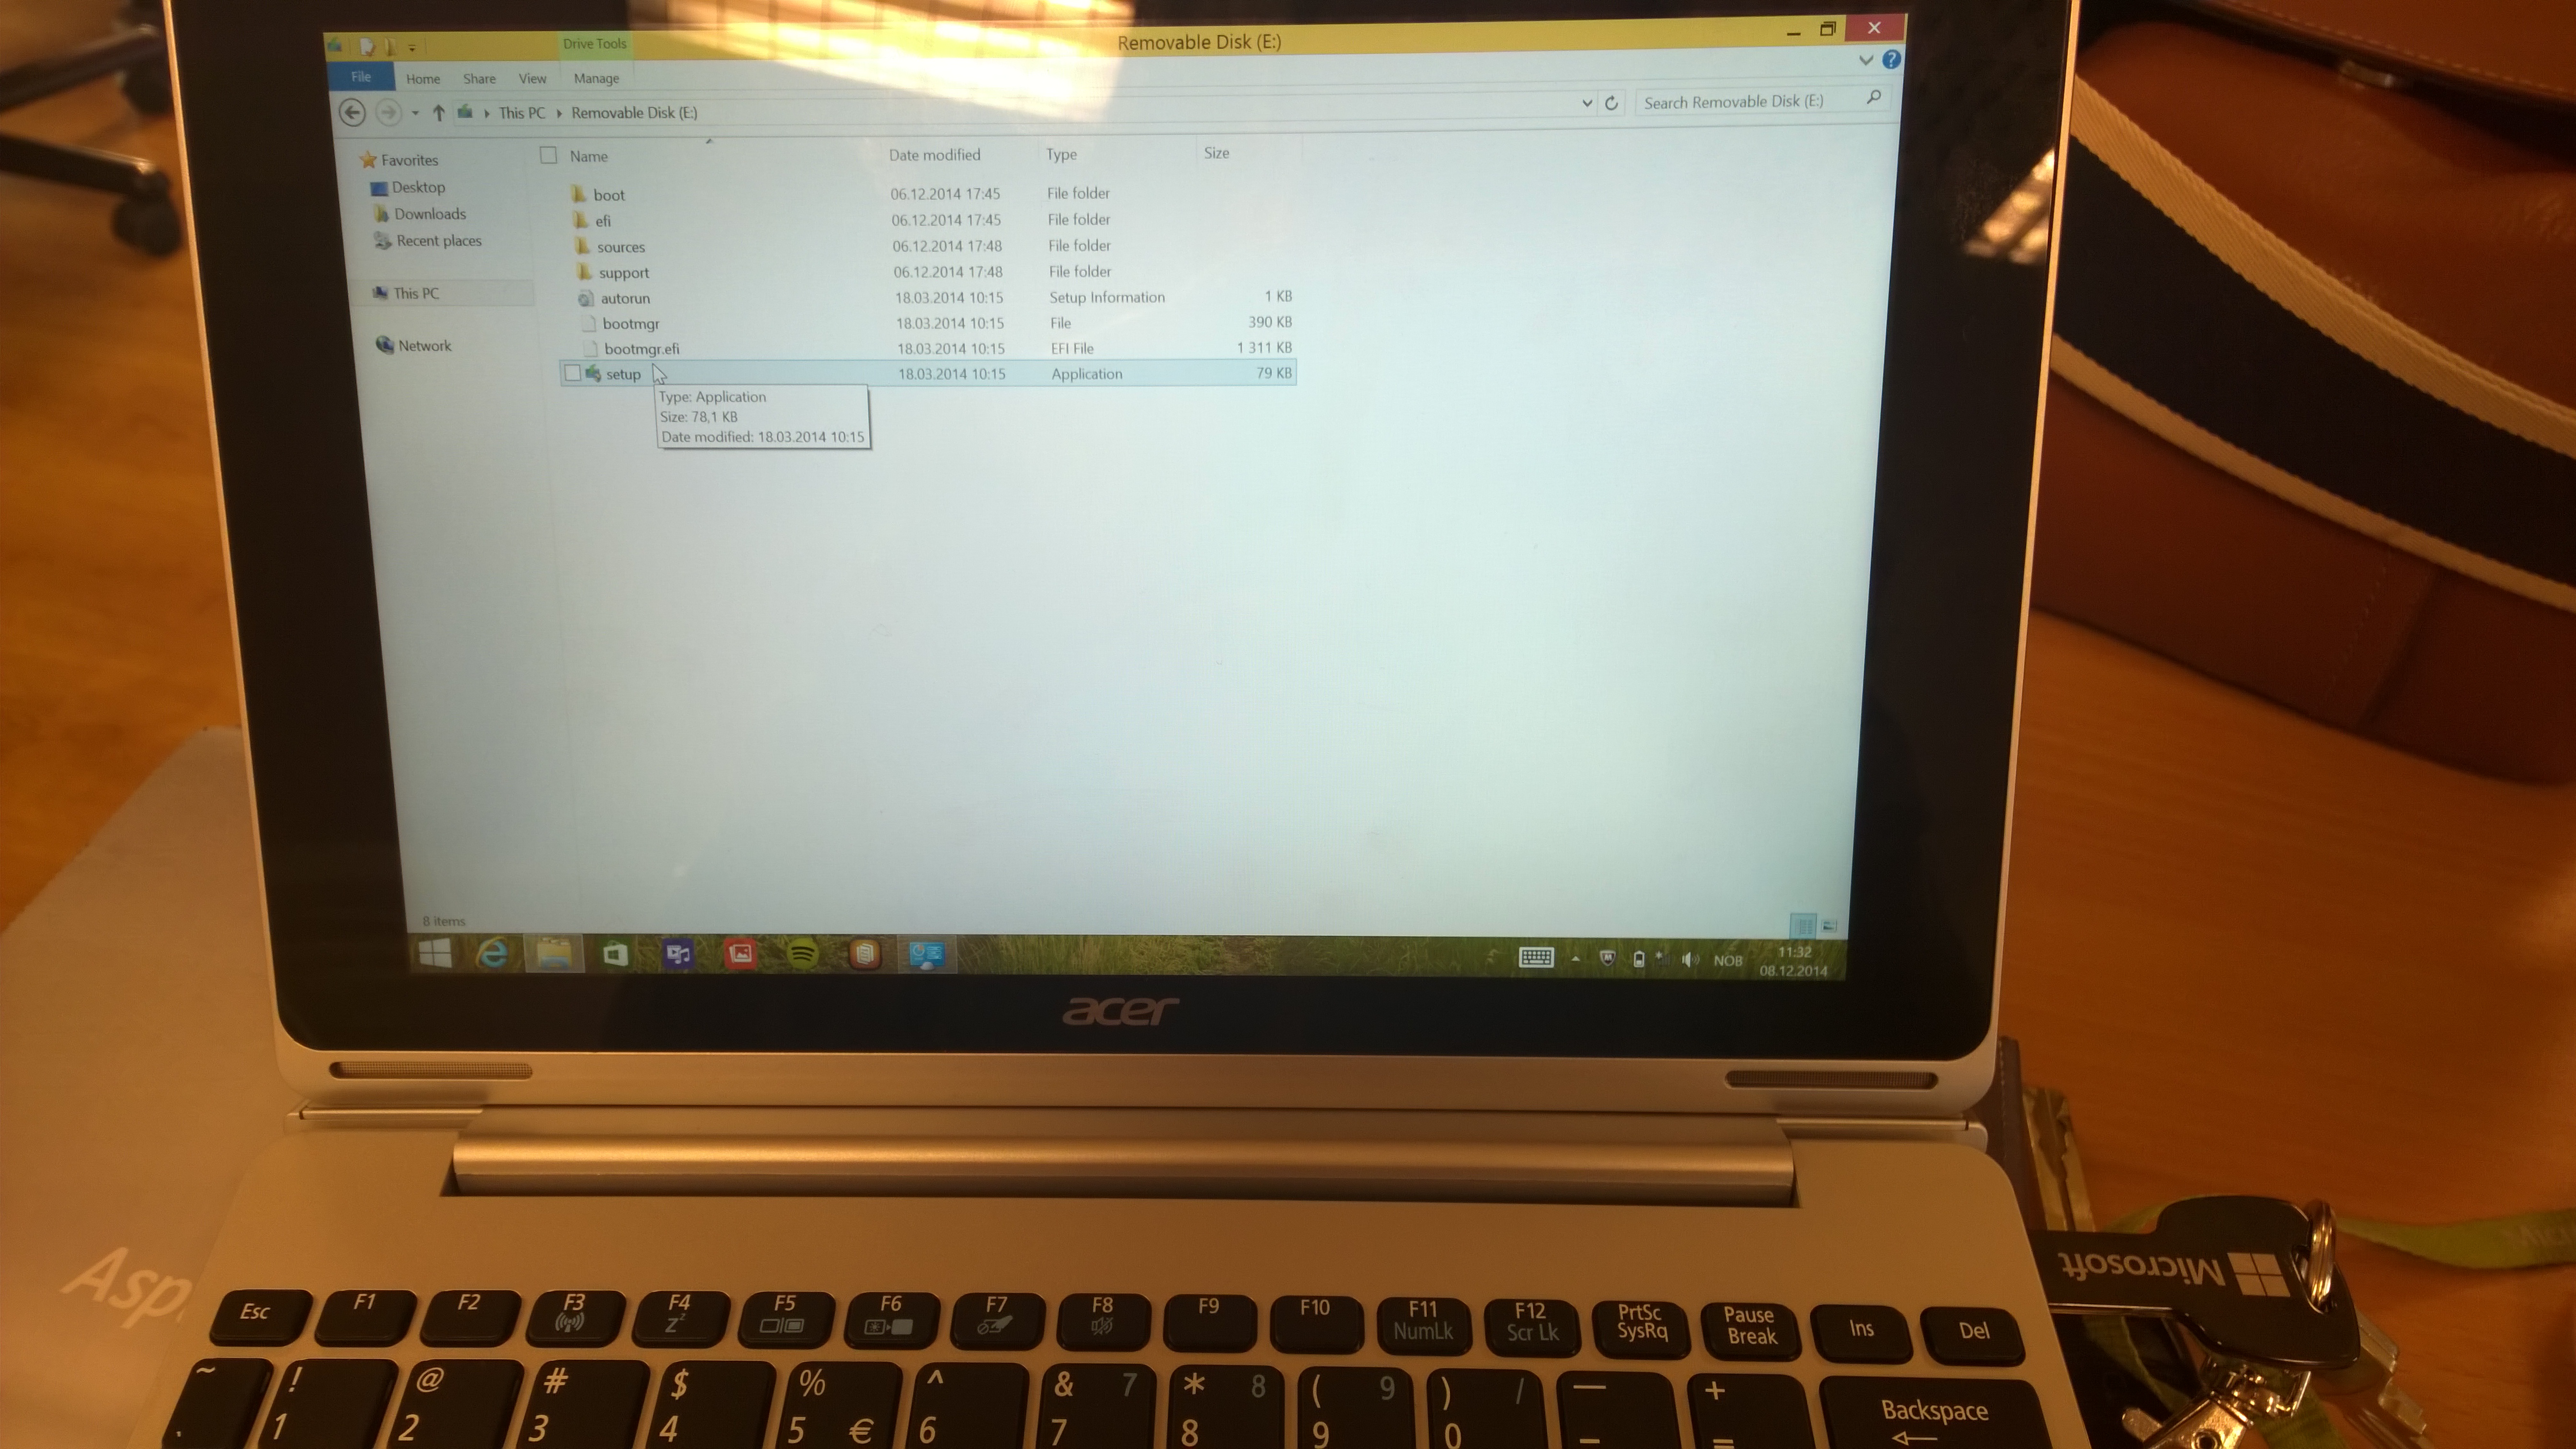
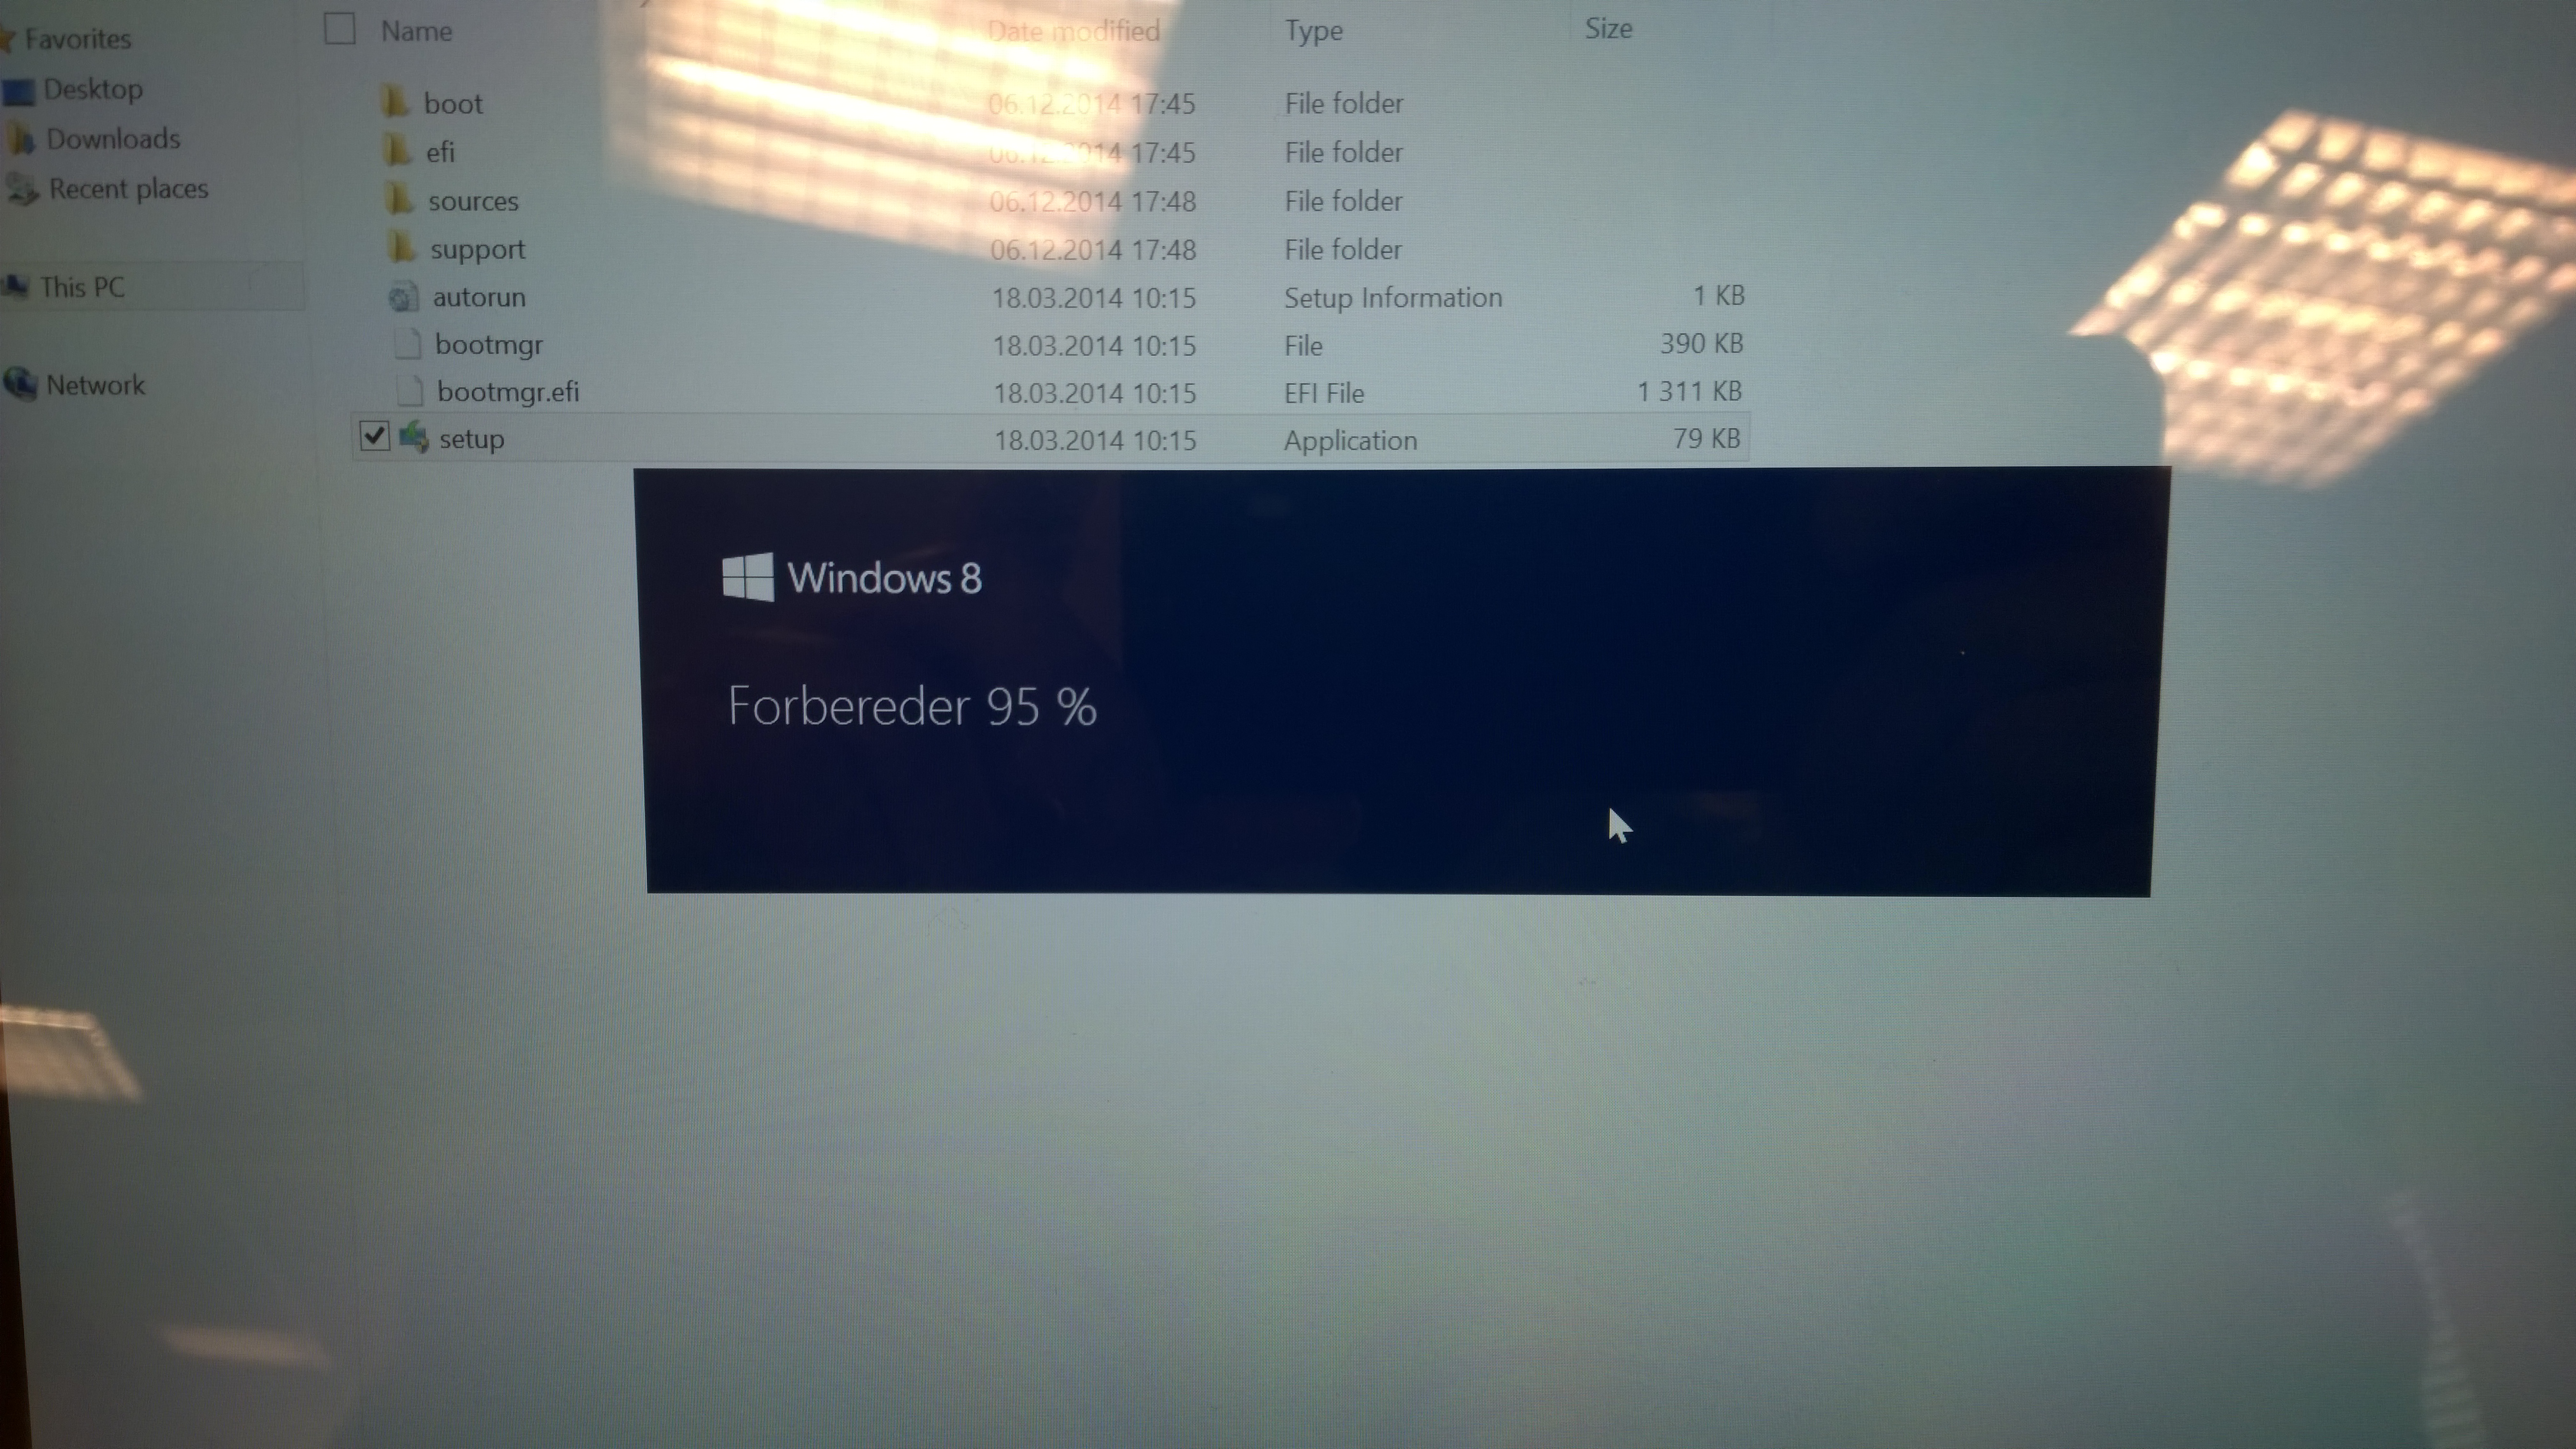
How to make a Windows 10 Bootable USB stick that support UEFI boot. |
Requirements:
|
| Make a bootable USB flash drive using DISKPARTRun CMD.EXE as an administrator (Win-X then A), then run DISKPART with the following commands (not case-sensitive): |
| Command | What it does |
| LIST DISK | Shows all mounted disks. Find your USB flash |
| SELECT DISK n | Selects the disk that future commands will use. Replace ‘n’ with the disk # for your USB flash drive.NOTE: Be careful that you don’t select your hard disk! The next command will wipe the selected drive clean. |
| CLEAN | Erases all previous partition & volume information on the flash drive. |
| CREATE PARTITION PRIMARY | Partitions the flash drive as one partition for the whole drive. |
| SELECT PARTITION 1 | Selects the new partition so future commands will operate on it. |
| ACTIVE | Marks the new partition as active so the BIOS/UEFI can boot to it. |
| FORMAT FS=FAT32 QUICK | Formats the partition as FAT32.(NOT NTFS!) EXTREMELY IMPORTANT! |
| ASSIGN | Assigns a drive letter to the flash drive. |
| EXIT | Exits DISKPART |
At this point your USB drive is formatted. DO NOT format the drive with Windows Explorer or format.com; you will not be able to boot from it.
| Simply Copy files to the USB Drive and Prep the Windows 10 Image on the USB drive.
1. Copy Files
or
2. Prep the USB using CMD
|
Booting from the USB drive:Method 1:
Method 2
|
| Install Windows 10Go through normal Windows 10 |
Finishing up
|
If you want to Access Corporate materials With your Acer Switch running Windows 8 With Bing you need to Upgrade the Operating System.
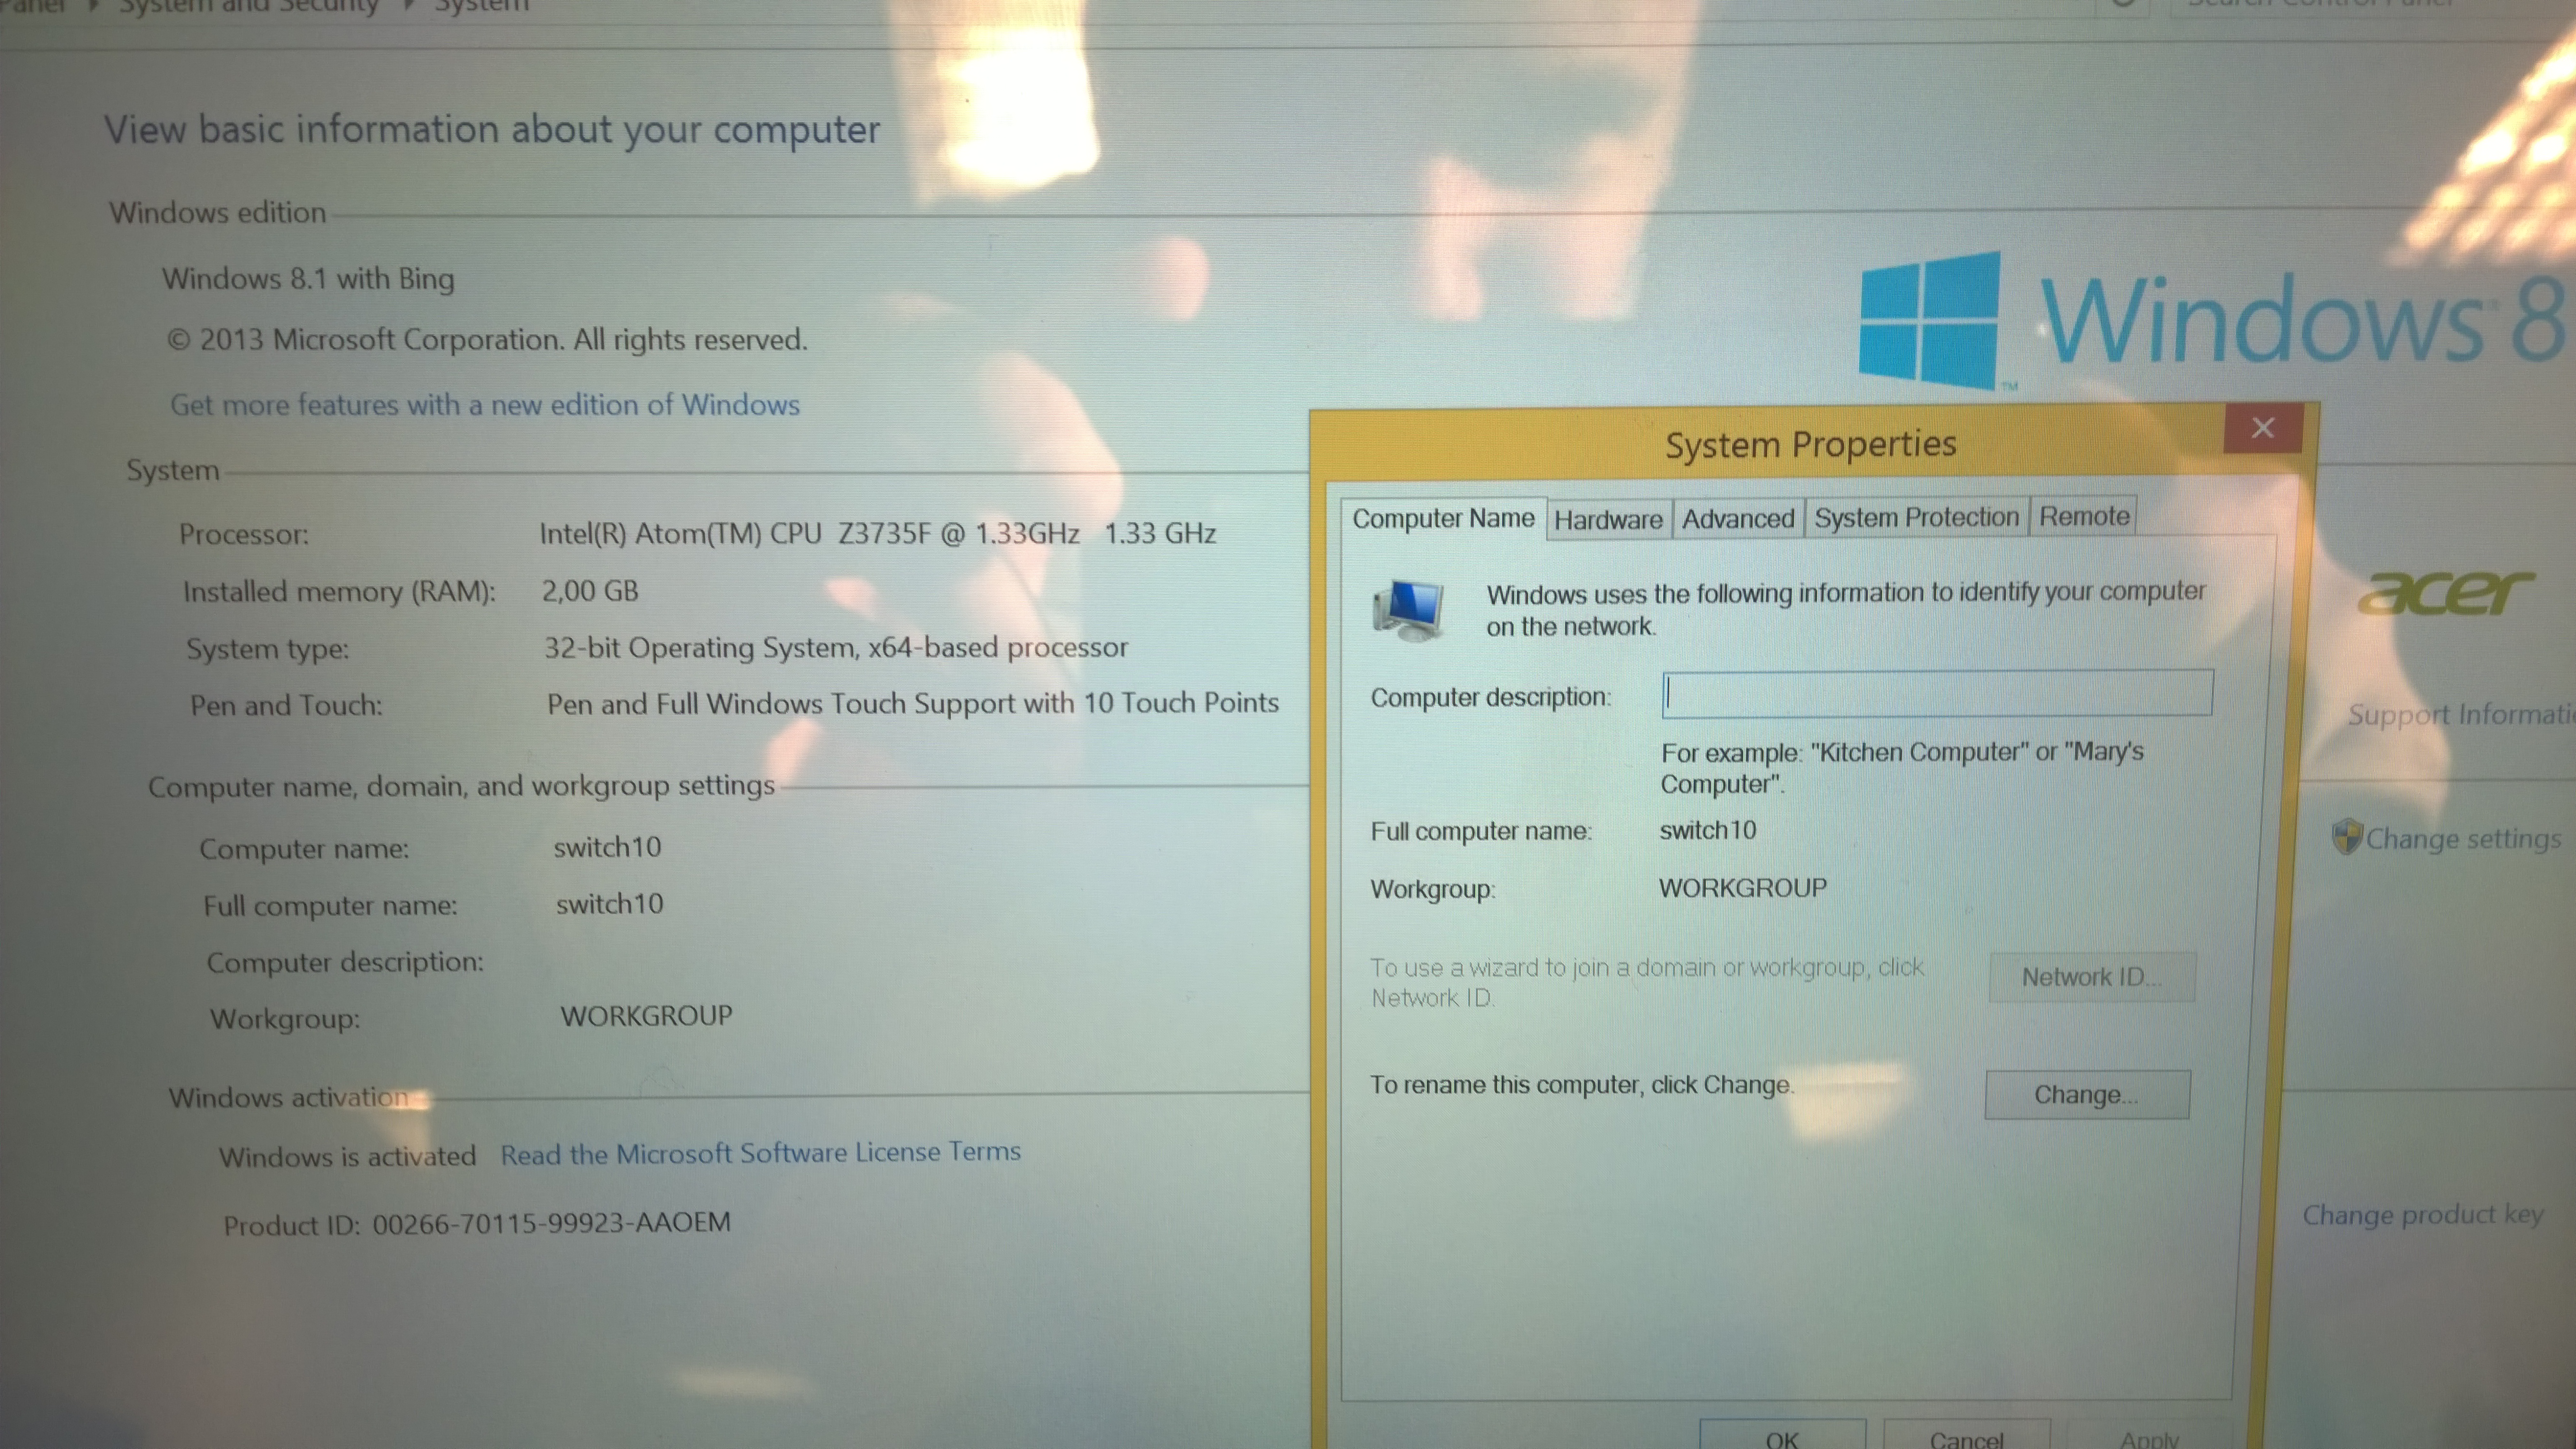
Before you start:
1. You need a 32 bit image of Windows Pro. (I used Windows 8.1. Multiple editions from MSDN)
2. A valid Windows MAK Key
3. Fully charged Device
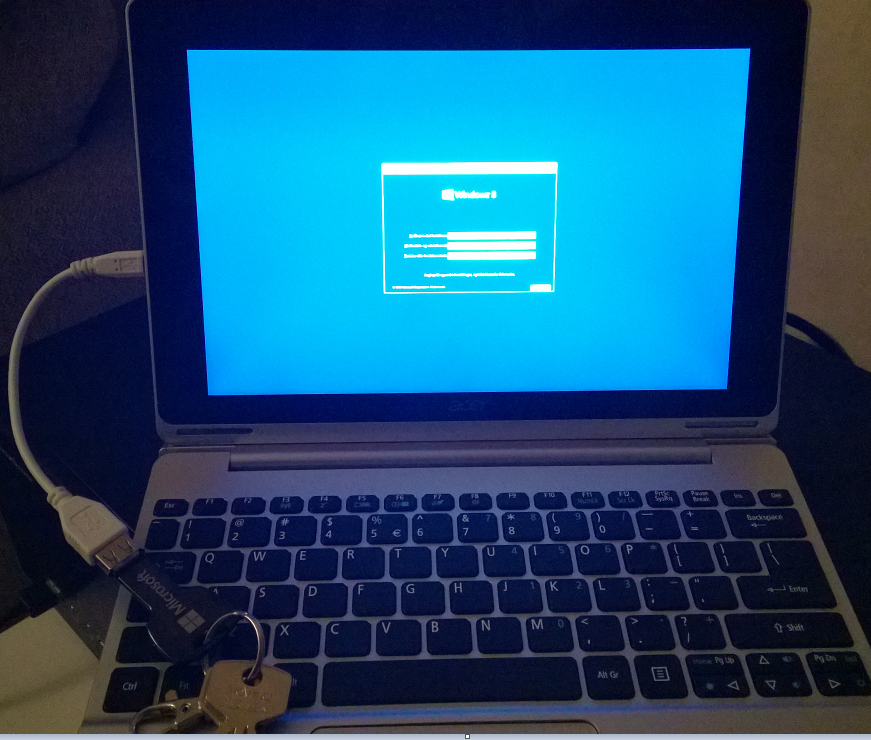
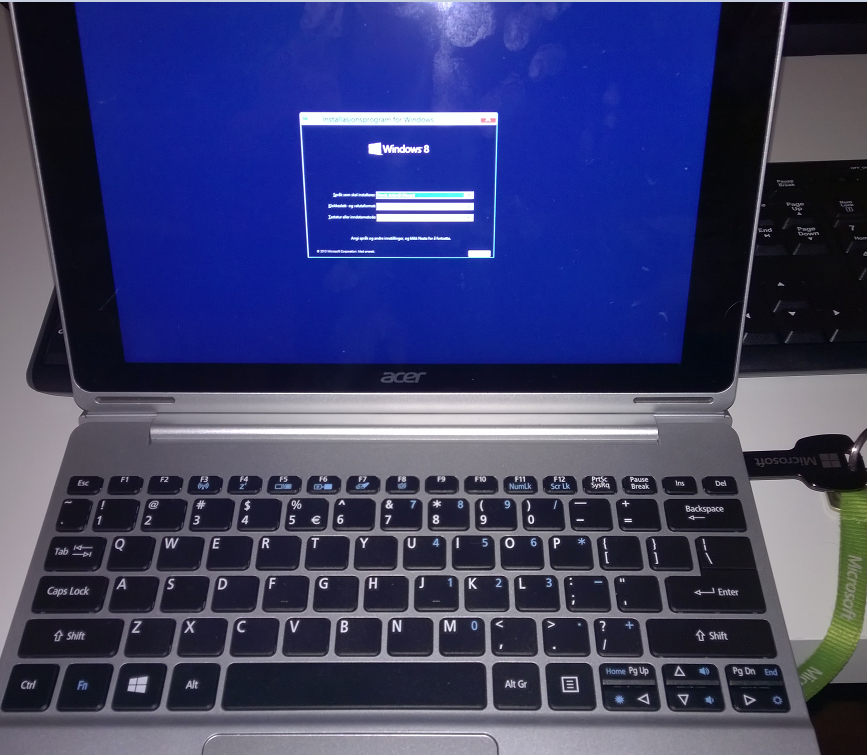
Boot Windows, Insert the USB Key into any port, in file Explorer run Setup.exe. then Follow the Instructions Below:
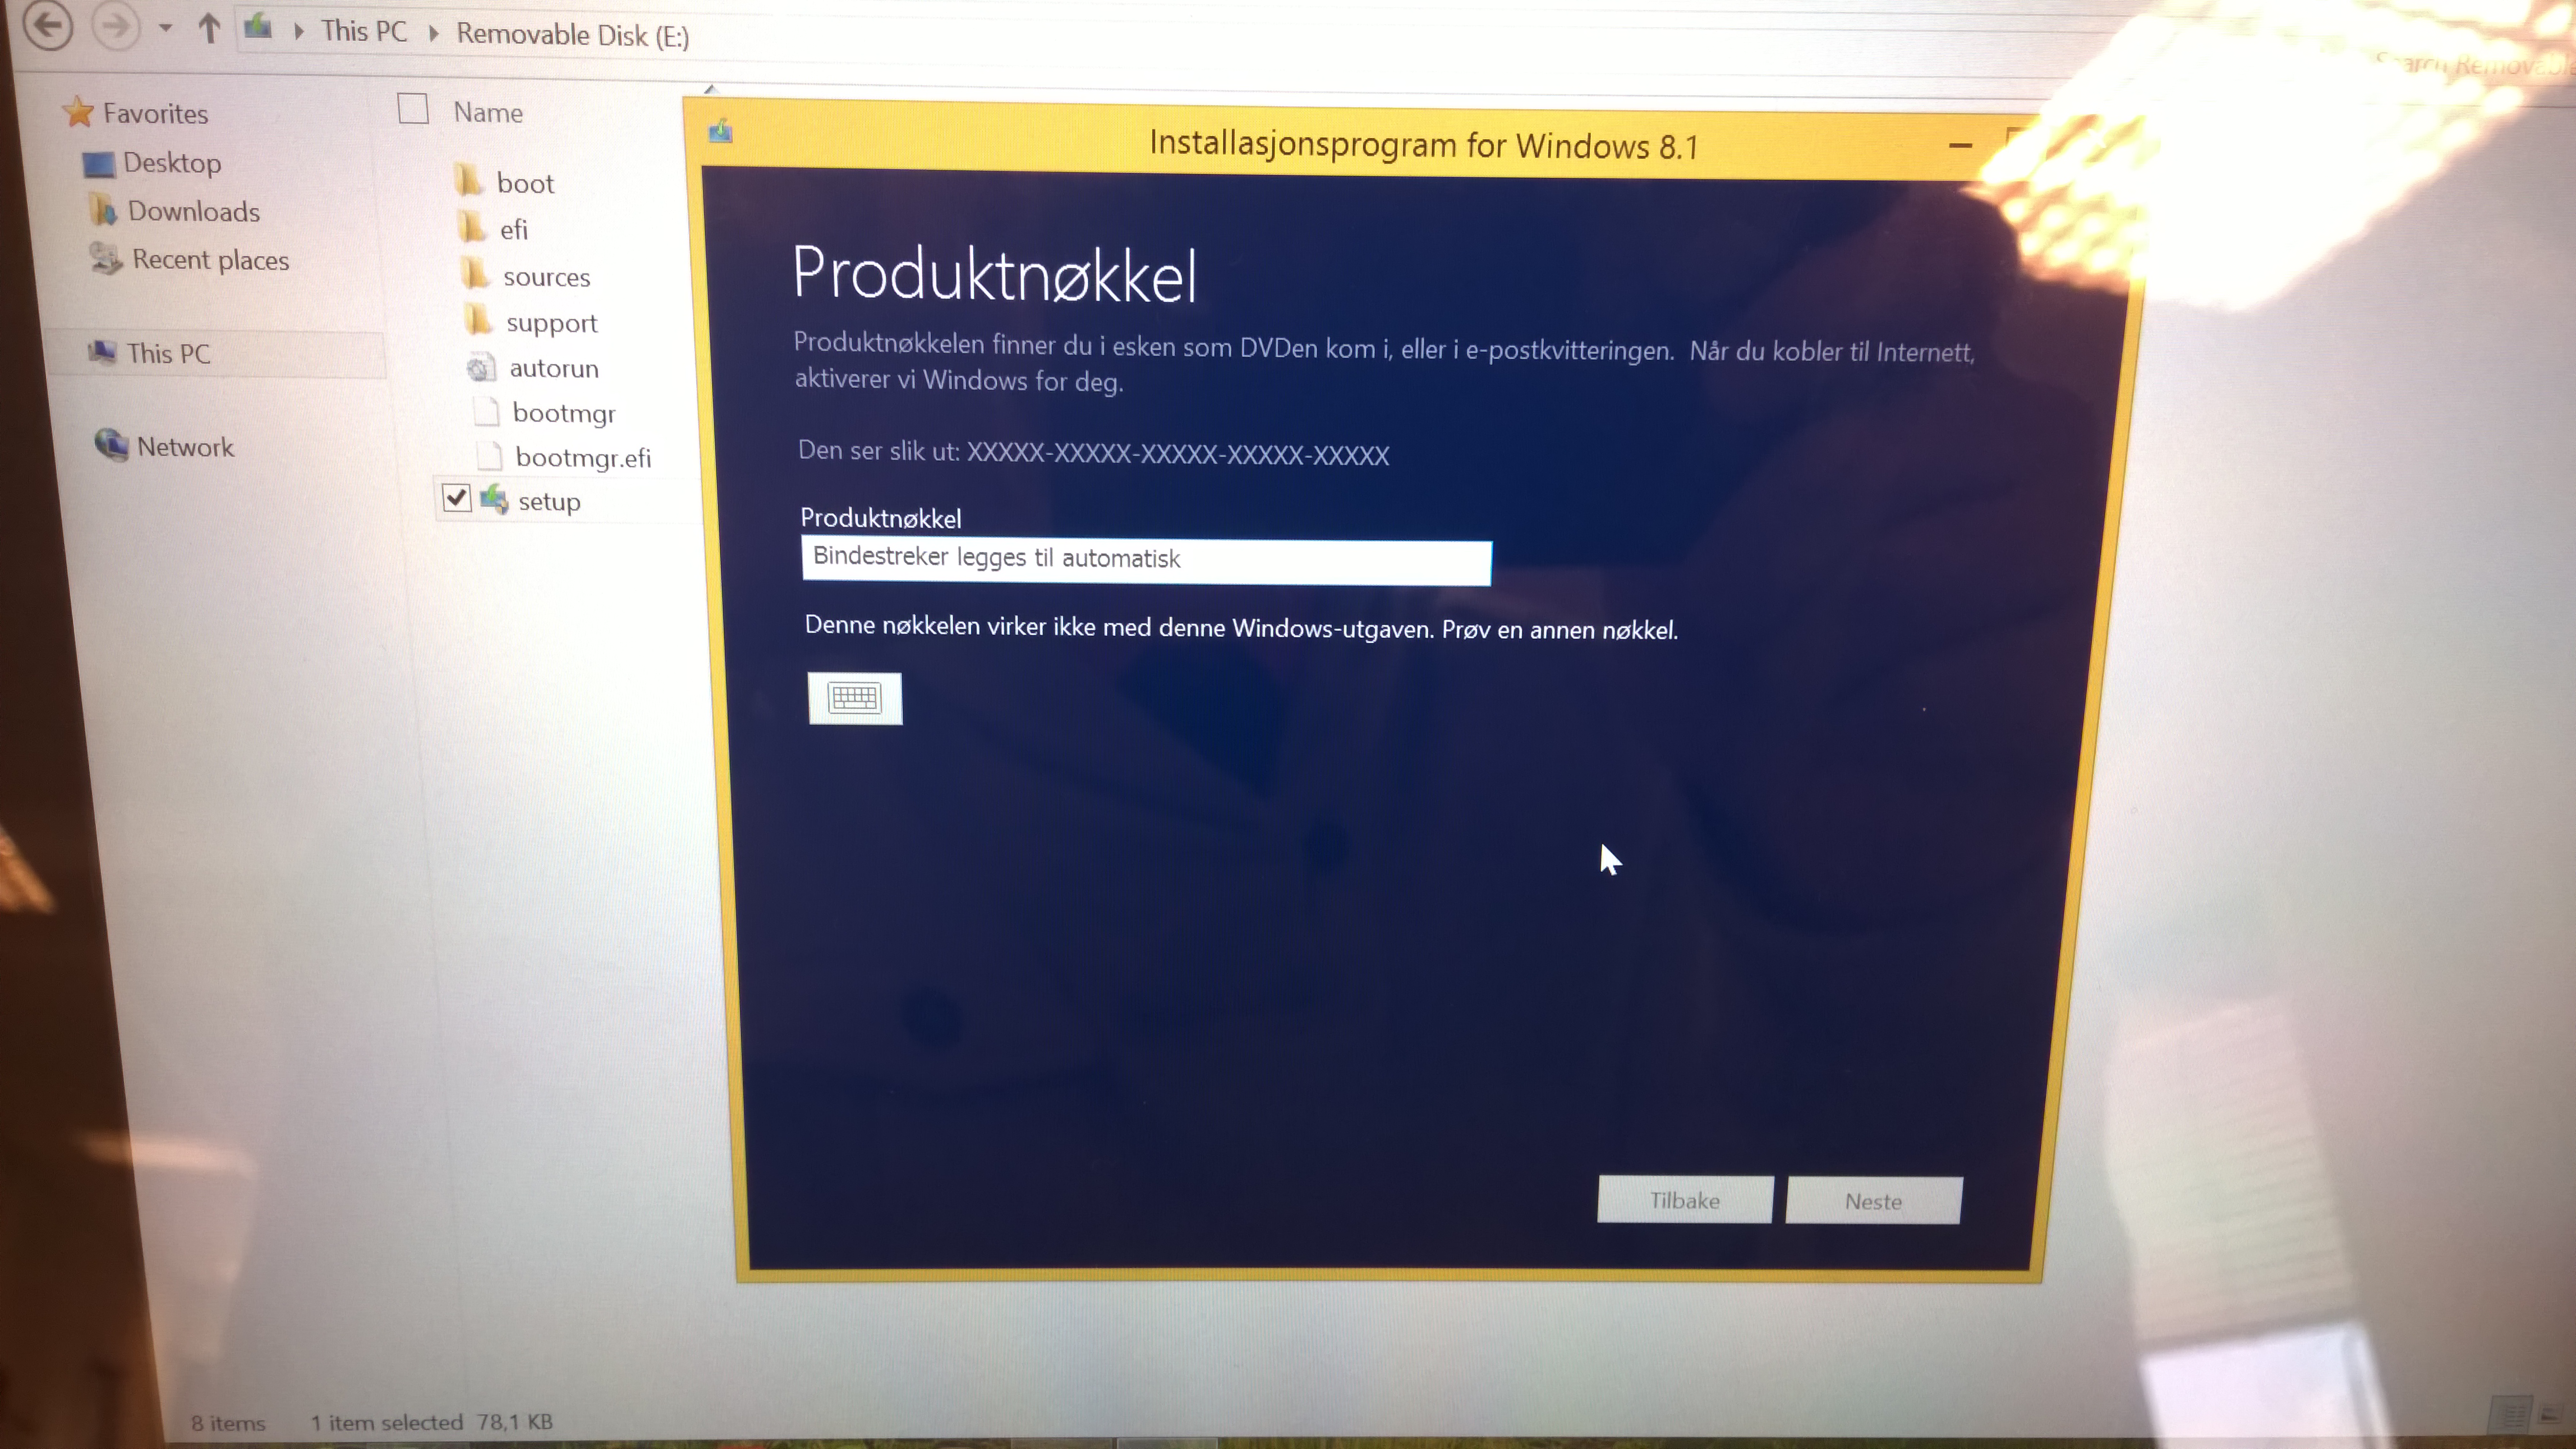


Before you start,
1. USE A 32bit WINDOWS IMAGE. Atom CPU’s does not read x64
2. Prepare your USB for UEFI – Follow my guide here to properly prepare your USB for boot.
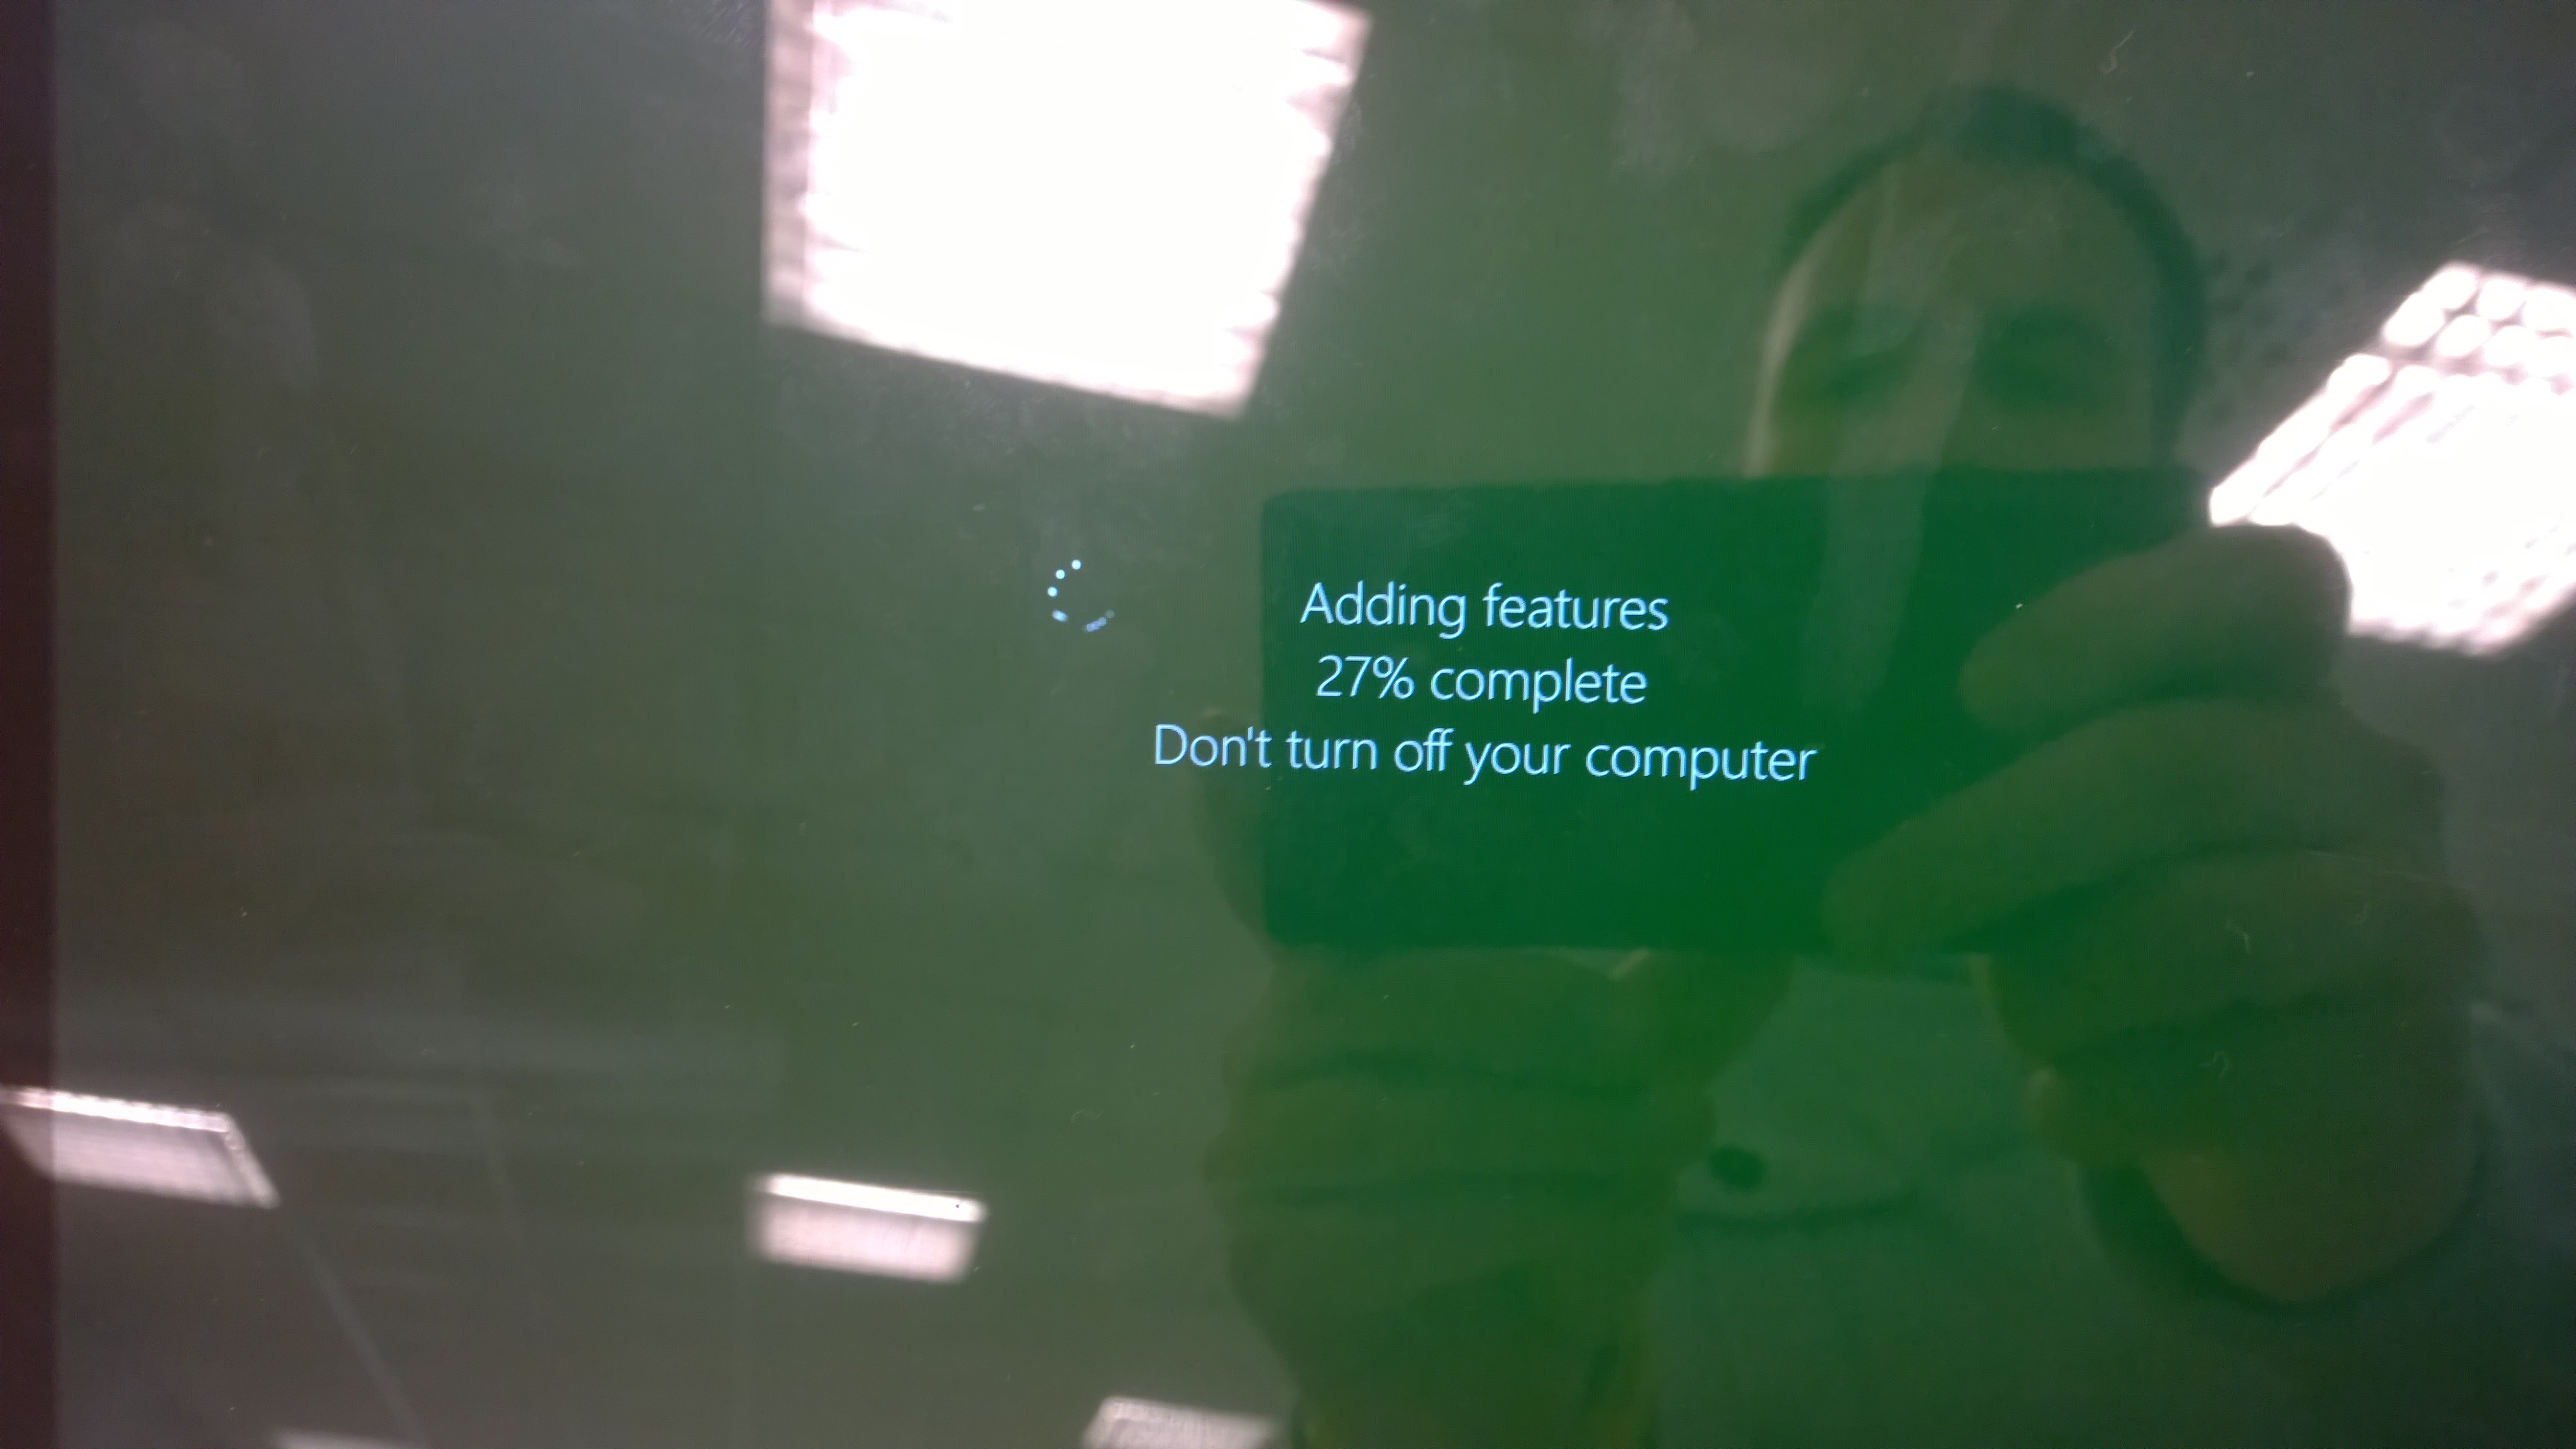
Installing Windows 8 Enterprise on Surface Pro
Why do I need to do all this fuss? -Most new devices are delivered with UEFI instead of BIOS. Alot of security benefits here. Some of you might experience that these devices do not automatically boot from a bootable key that you plug in. Please follow my instructions above.
When you are ready.
1. Do not insert the USB key yet, boot your device first.
2. Once your device is in Windows insert your USB Key, swipe on the right side to bring out the charms. Select Settings

3. Select Change PC settings

4. In PC Settings, select Update and Recovery

5. Select Recovery and Click Restart now

6. The PC will reboot and you get this option, Select Use a device

7. Then use the EFI USB Device (You can also boot IPV4 Network boot)


Before you start,
1. USE A 32bit WINDOWS IMAGE. Atom CPU’s does not read x64
2. Prepare your USB for UEFI – Follow my guide here to properly prepare your USB for boot.
Installing Windows 8 Enterprise on Surface Pro
Why do I need to do all this fuss? -Most new devices are delivered with UEFI instead of BIOS. Alot of security benefits here. Some of you might experience that these devices do not automatically boot from a bootable key that you plug in. Please follow my instructions above.
When you are ready.
1. Press and hold Power Button + Volume Up
![]()
2. (OPTIONAL) As you have powered on the device, release power button and keep holding Volume up until you enter the UEFI.
Here, navigate to Main and Select Enable to F12 Boot Menu
3. Go to Boot and change the Boot priority order make sure that USB CDROM and USB HDD are on top
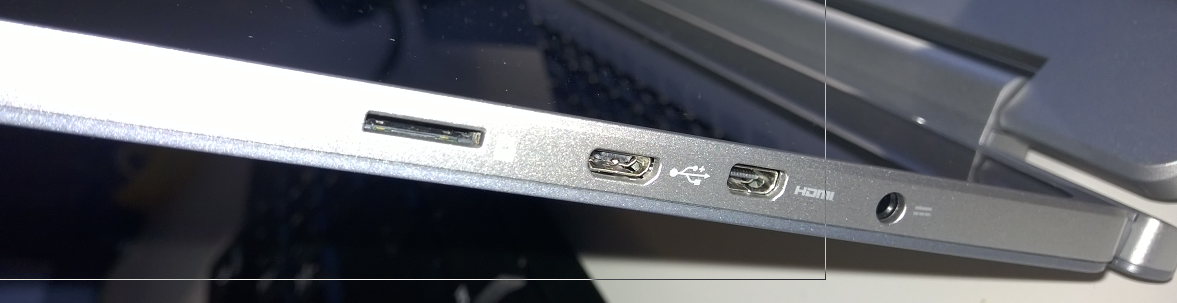
4. Its Now time to Plug in your USB Key. You can plug it in to the Keyboard dock or the Tablet using Micro-USB to USB adapter
I used the Adapter on the picture below.

5. Navigate to Exit and select Exit Saving Changes.
The Device will now boot from either the Adapter (Left) or Keyboard dock (Right)

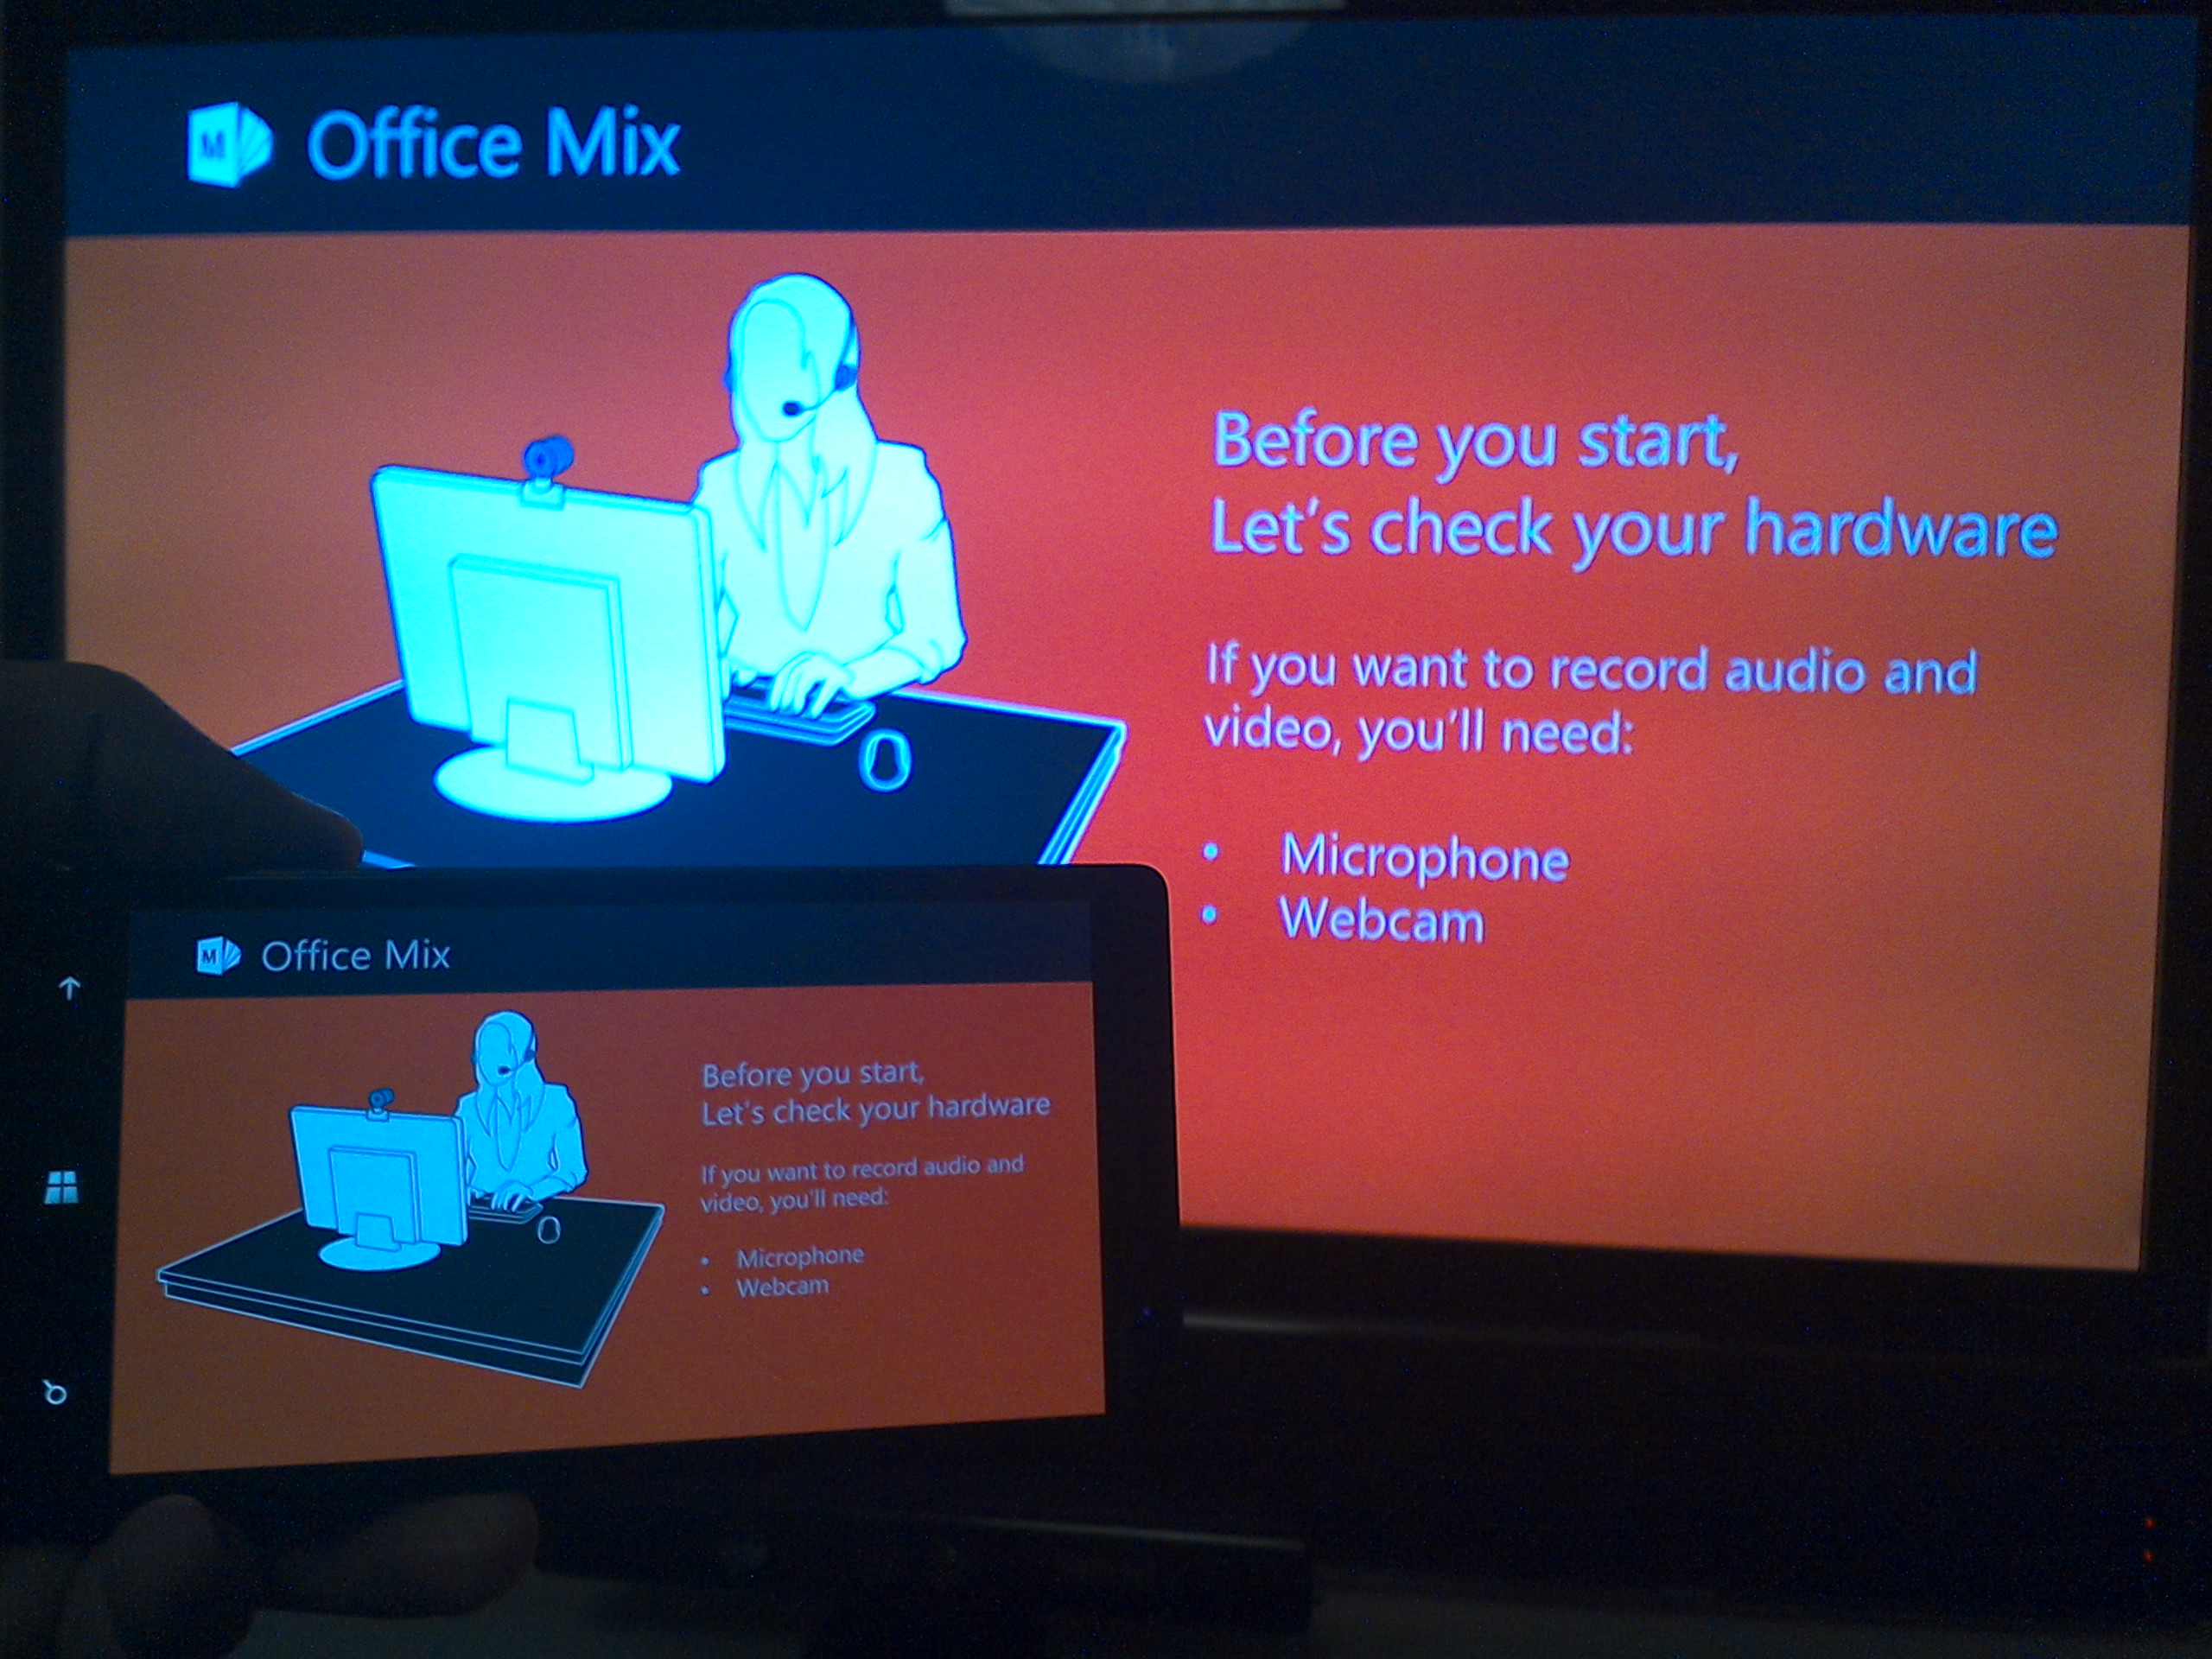
If you are looking for a way to wirelessly transfer the content of Your screen to “the big screen” there are 3 popular ways to do it.
Of the 3 Technologies above, Miracast is probably the dumbest Technology. Miracast is only a Wireless HDMI/VGA cable. It does what the HDMI/VGA cable is supposed to, transmit sound and image. If you compare it to Apple TV or Chromecast the Miracast will disapoint you since you MUST Connect it to a computer for it to do anything at all.
The Box feature all you need, the adapter itself can take Power from USB on the tv or from the wall socket.

There is also a HDMI extension cable if the dongle does not fit into the TV directly.
Here is a tip: Leave the metal band on the USB cable to avoid cable clutter!
The unit require a larger powersupply like HDD’s so if Your TV has a HDD usb port it will supply the right amount of Power, plug it into any other port and it may start to reboot constantly. You may also Connect it to the wall socket.

It’s fairly easy to Connect it using a Windows tablet, here on a Dell Venue Pro 8
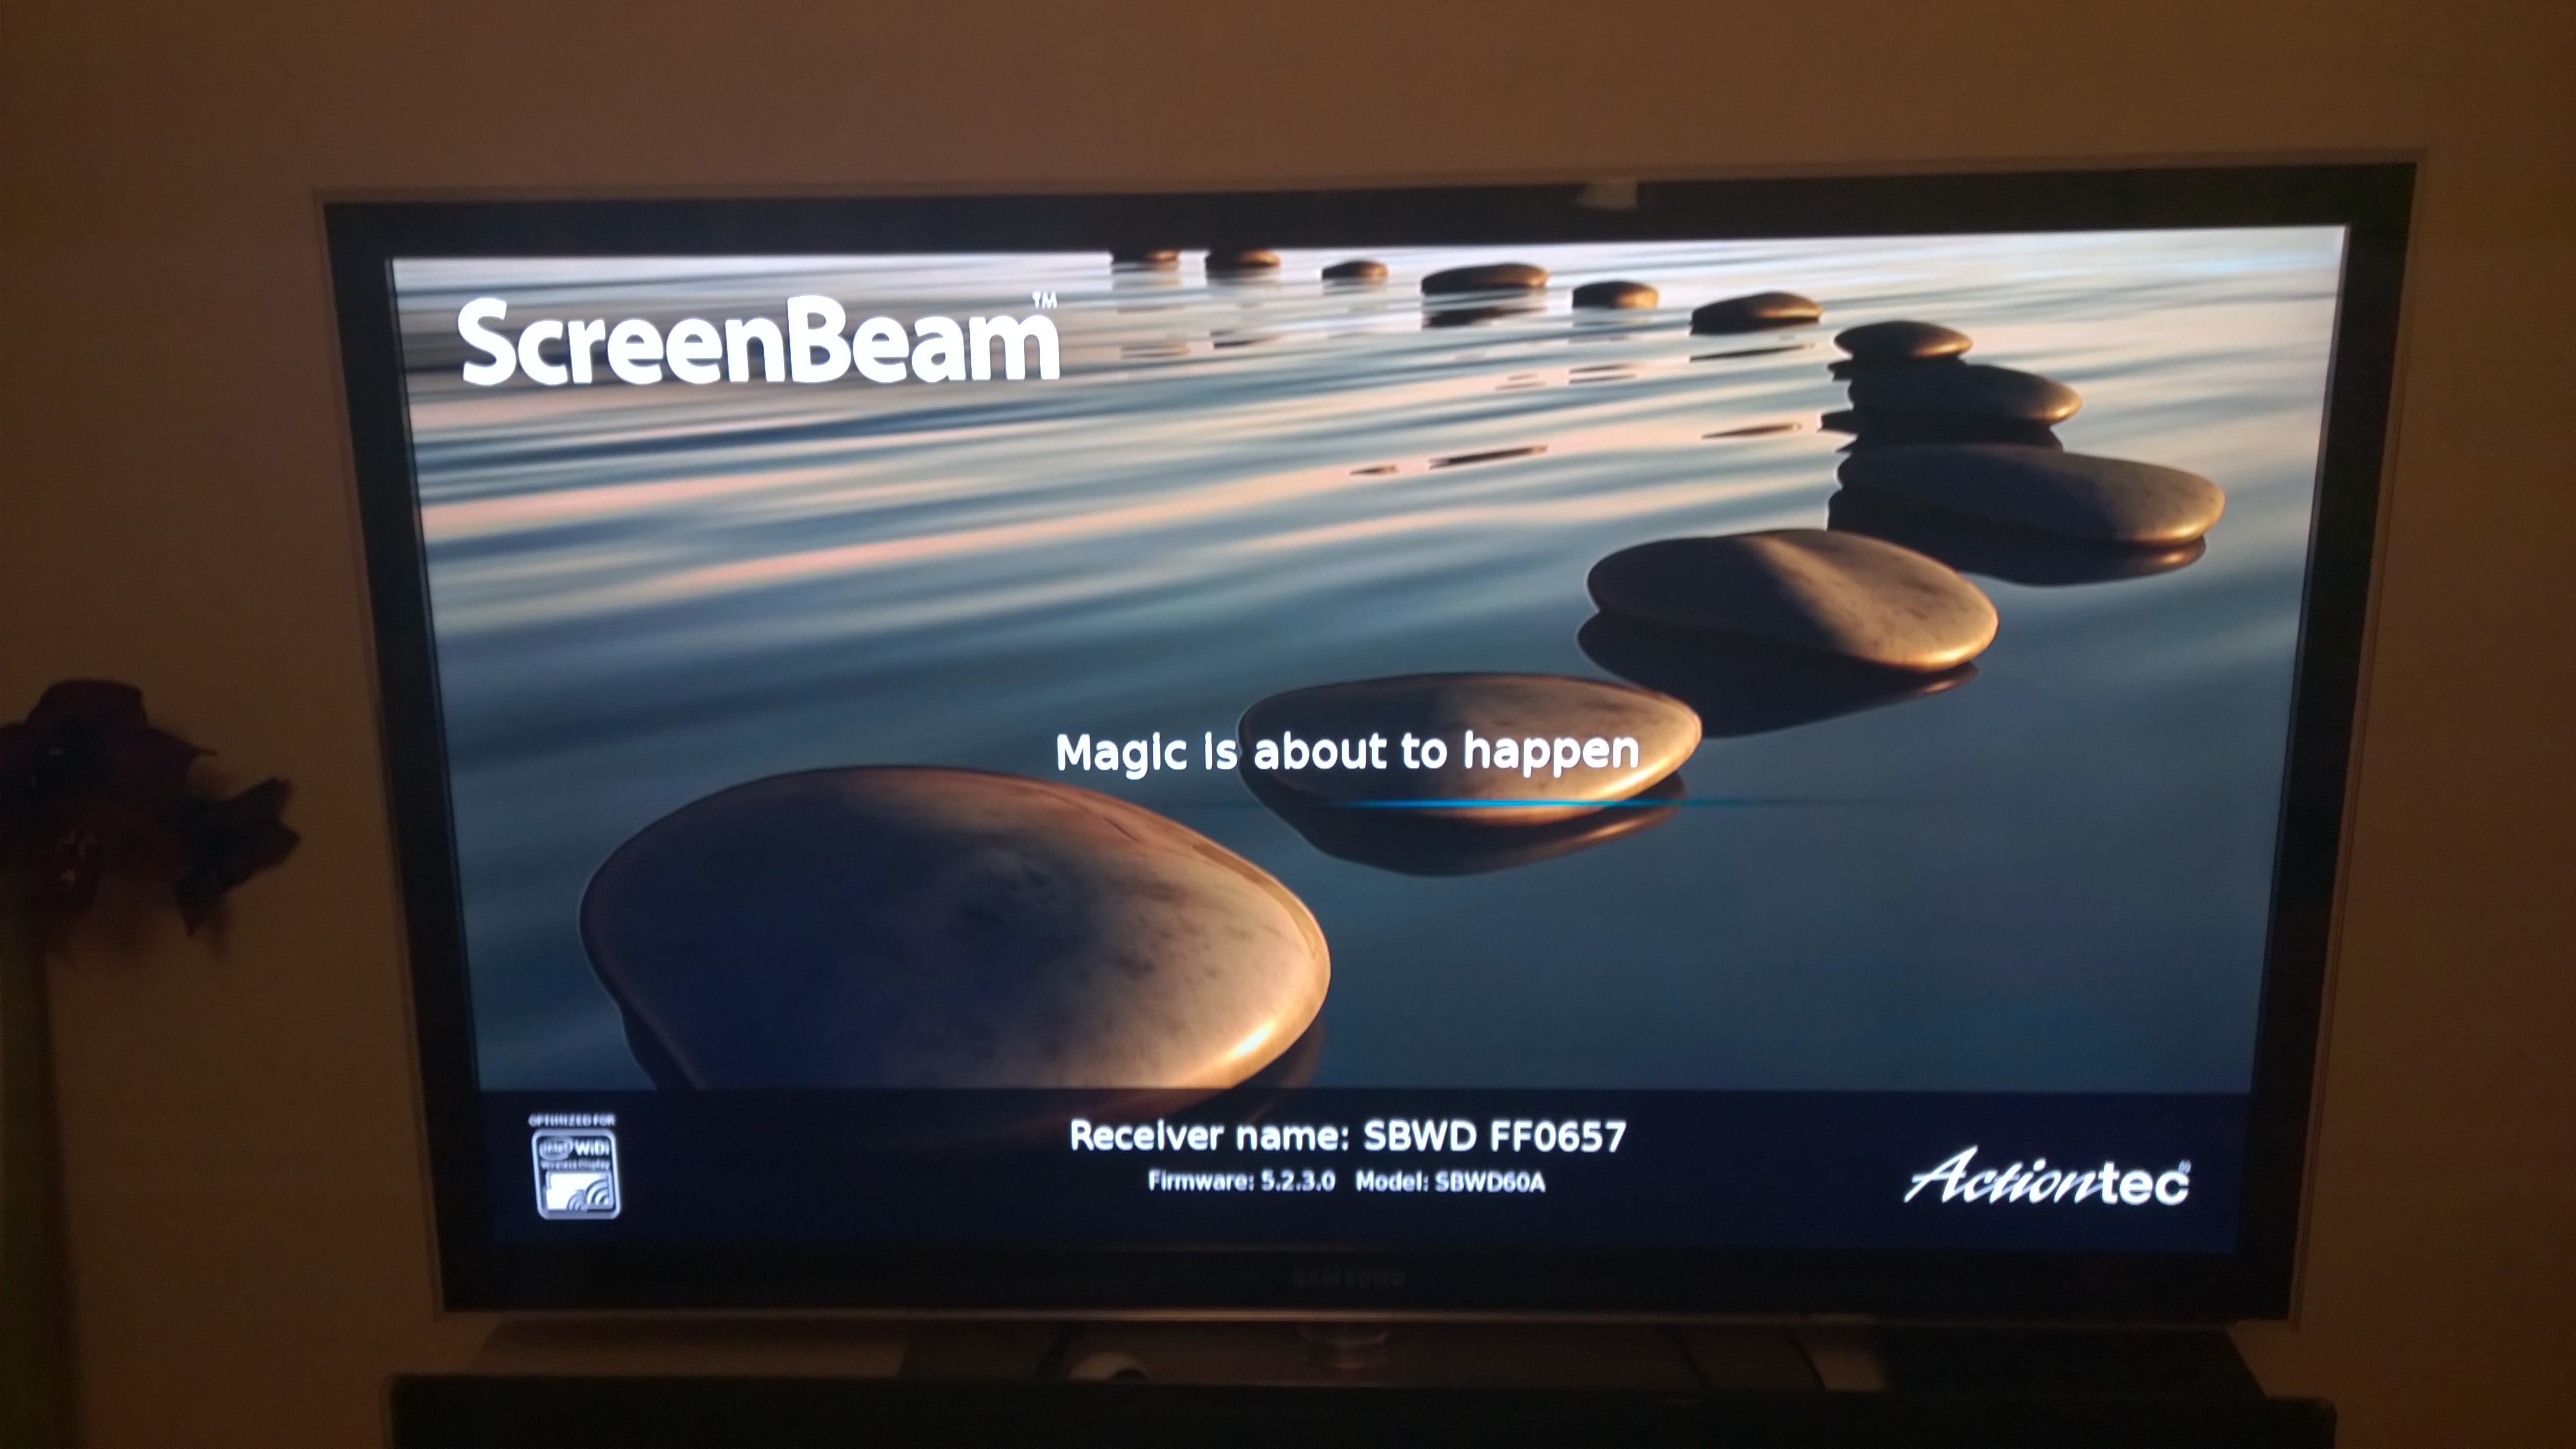
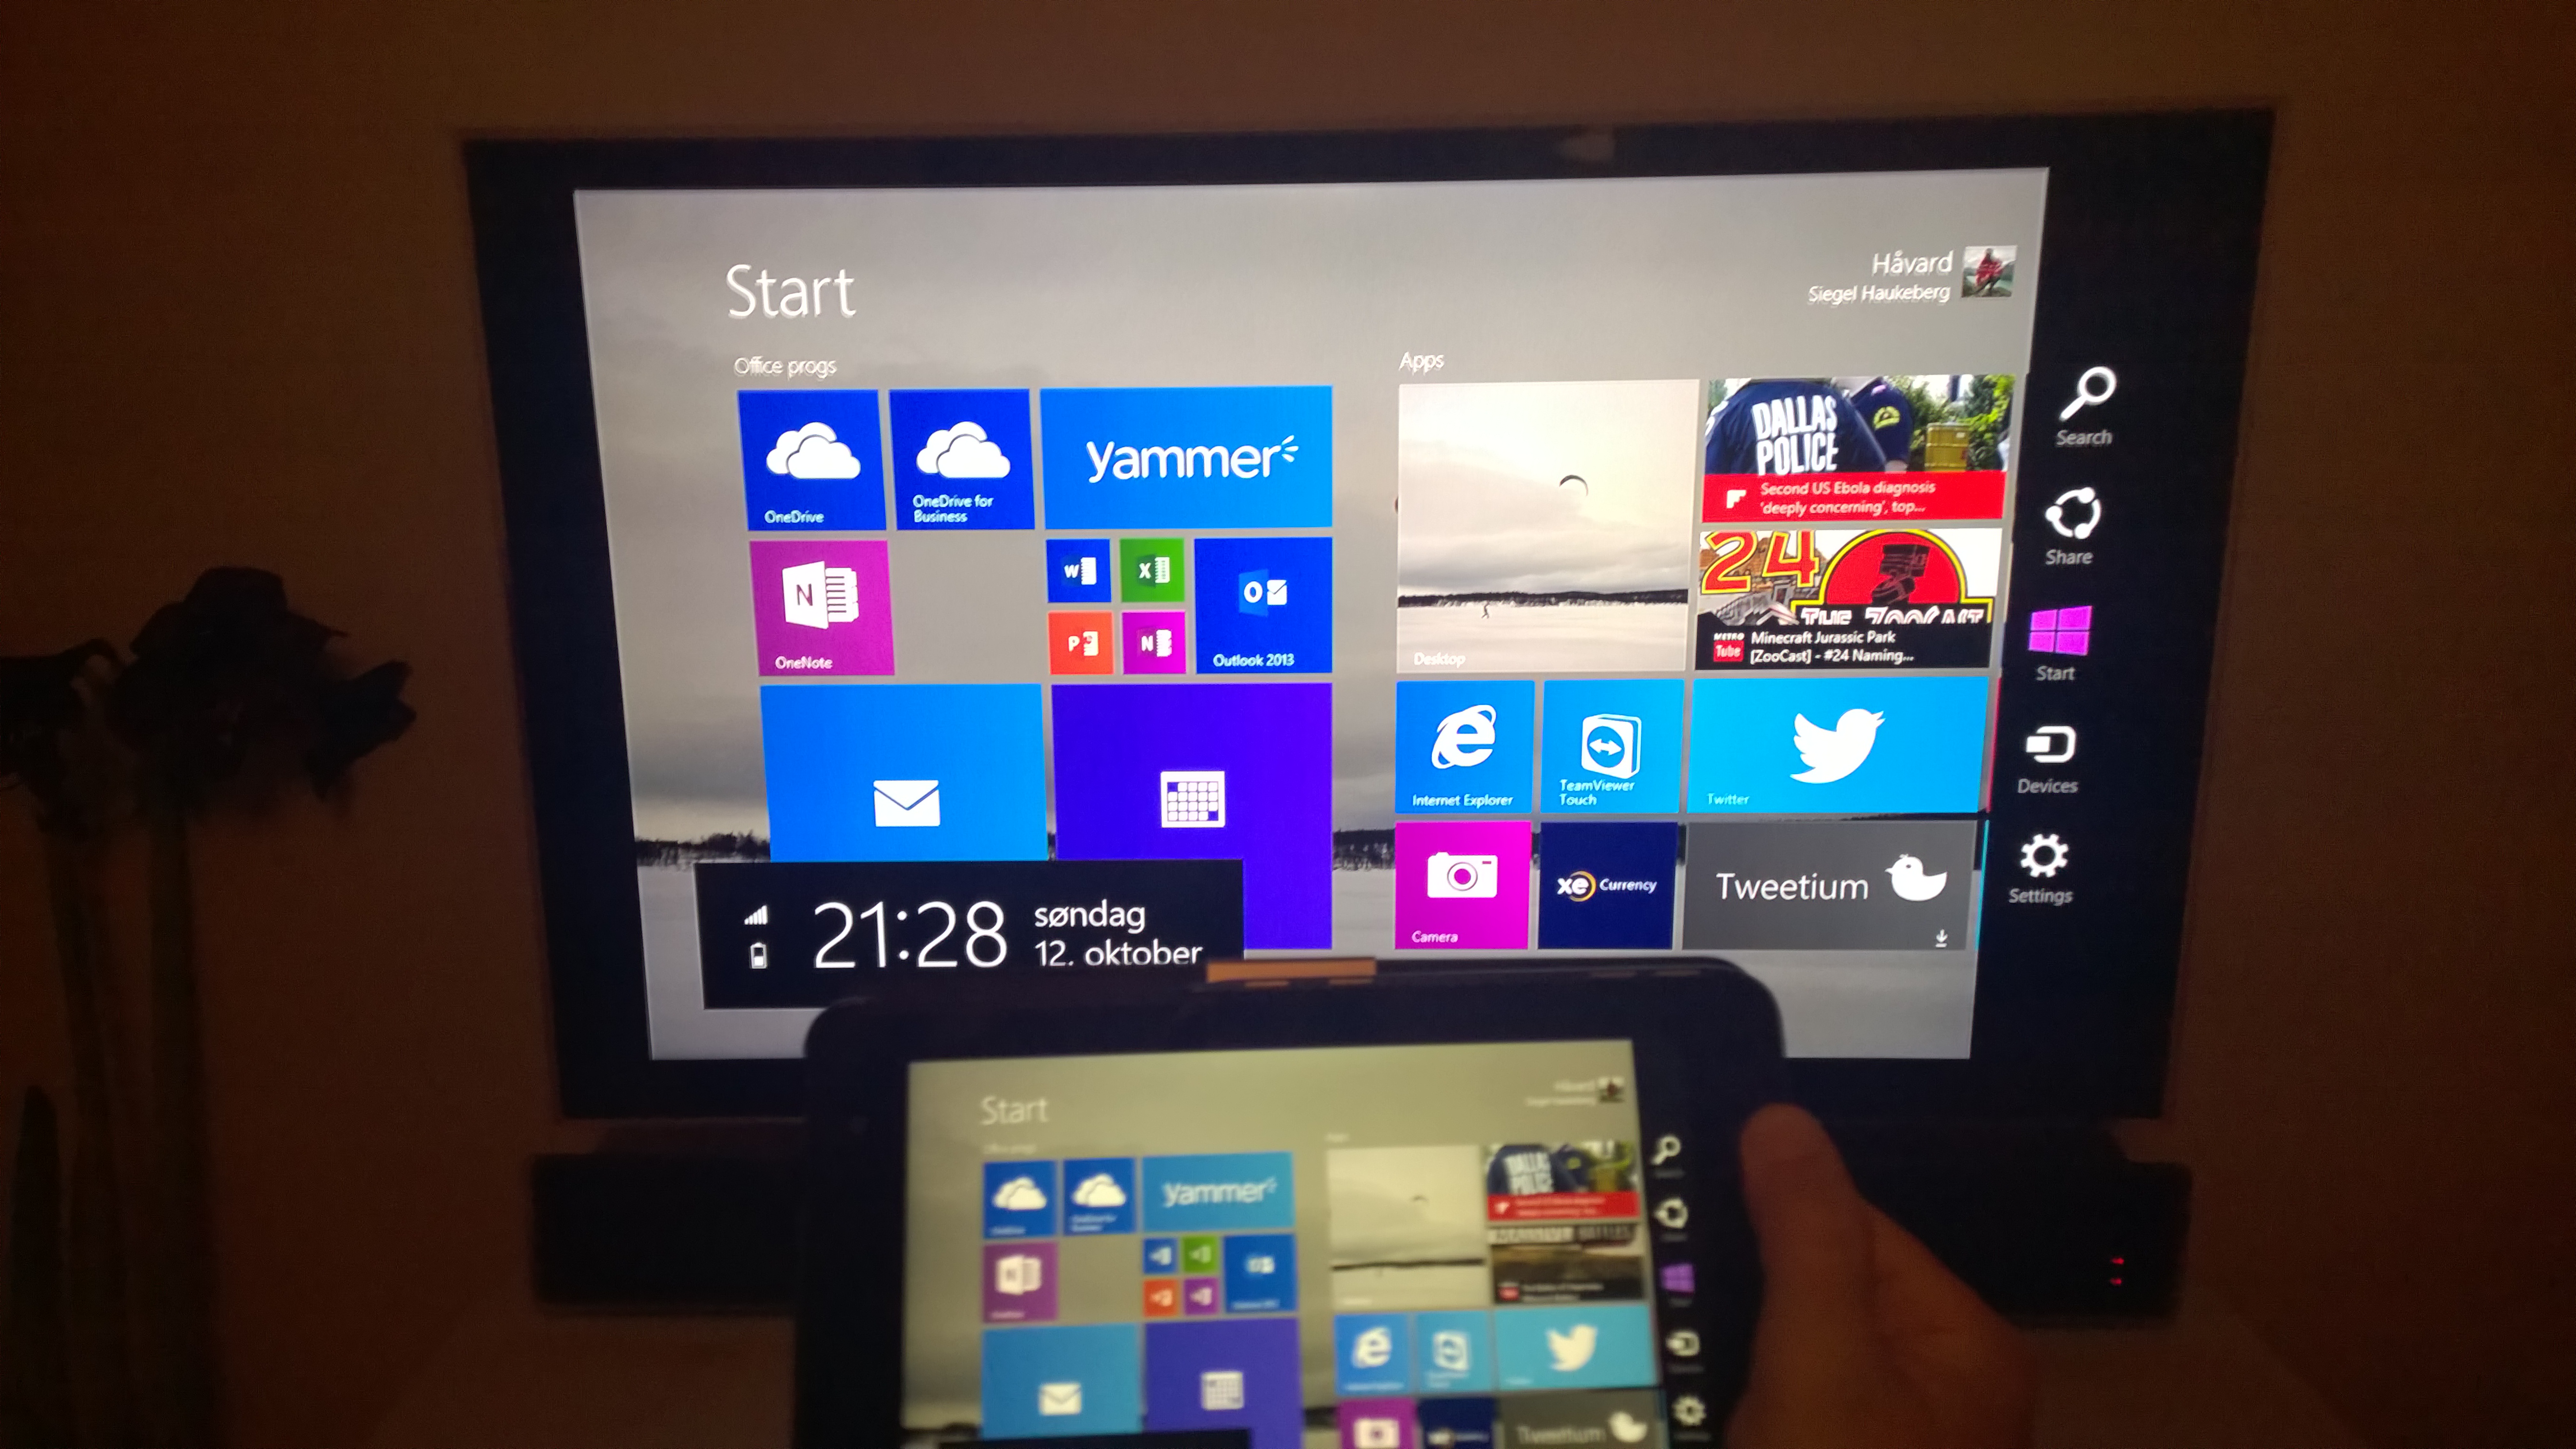
Fairly easy aswell. Go to Settings->Project my screen->Click Your adapter.


An other tip: Rotate the phone to landscape in order to watch a Movie from Youtube or to present a PowerPoint presentation.
Microsoft Recently Launched its own Miracast Dongle: http://winsupersite.com/mobile/microsoft-wireless-display-adapter-first-impressions?r
Product Link: http://www.actiontec.com/327.html

If you have a small Device you would want to use the Modern UI because it support touch inputs better.
Here is how you switch between the modern and desktop Version:
Open IE, click the Cog, Internet Options, Programs then uncheck the first checkbox below “Åpne Internet Explorer-fliser på skrivebordet” which translates into open Internet Explorer tiles on desktop.
Then hit the Windows Key and click the IE metro icon.


You must be logged in to post a comment.