The Samsung Smart Washer WW10H9600EW (Samsung Vaskemaskin WW9000) from Elkjøp is a very very good washer for under 10.000 NOK and it has one thing which I looked for:
Auto dosage / Automatisk Dosering
Miele also have this but its way more expensive and you have to use Miele detergent. That is way more expensive and it is just stupid. The finish and technology on the Miele machine is also way way way behind.
On the Samsung Washer you can use and brand liquid detergent and fabric softner. This is just super!. I use Blenda Sensitive detergent and Comfort Sommerfrisk fabric softener.
The look of the unit is superb. Great finish.
It works great with the touch panel and has tons of pre set menu’s. Its very silent during operation and during sentrifuge. Very very nice!
The touch panel is responsive and easy to use. It also has a built in light so you can see what is going on inside the machine at any time.
I do not use the phone apps because they suck. Do not expect wonders here. I also do not have the need to turn on my washer when I am away. I can set a timer for that.
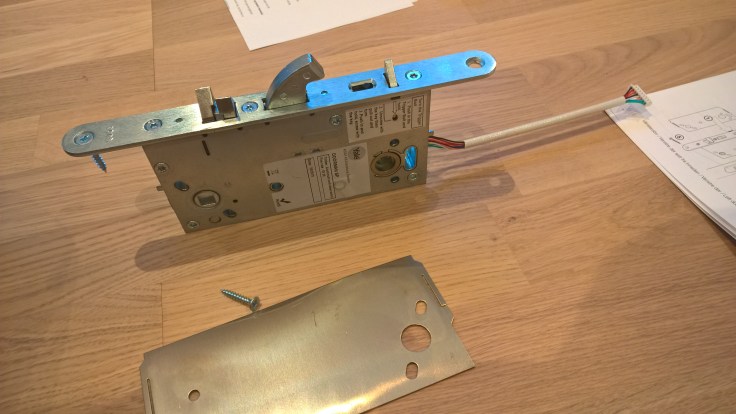
It can be very hard to mount the Yale Doorman, despite what the videos and commercials says.
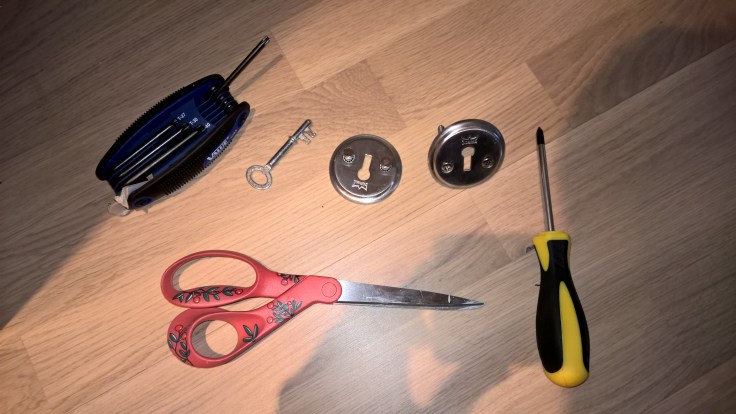
Before you start/buy make sure you have equipment to handle these two problems:
Removal of different screws – Drill bits for philips head and torx
Trimming of door edges – Hammer and chisle / Carver
Cutting metal screws – Cutting pliers
The only tools you need:
Electric Screwdriver with torx / Philips head
Manual screwdriver (Philips head)
Hammer
Chisle
Cutting pliers
YOU NEED TIME. Do not start this if you can not spare 2 hours atleast. As you are unscrewing the door lock there is no way to leave and lock the door.
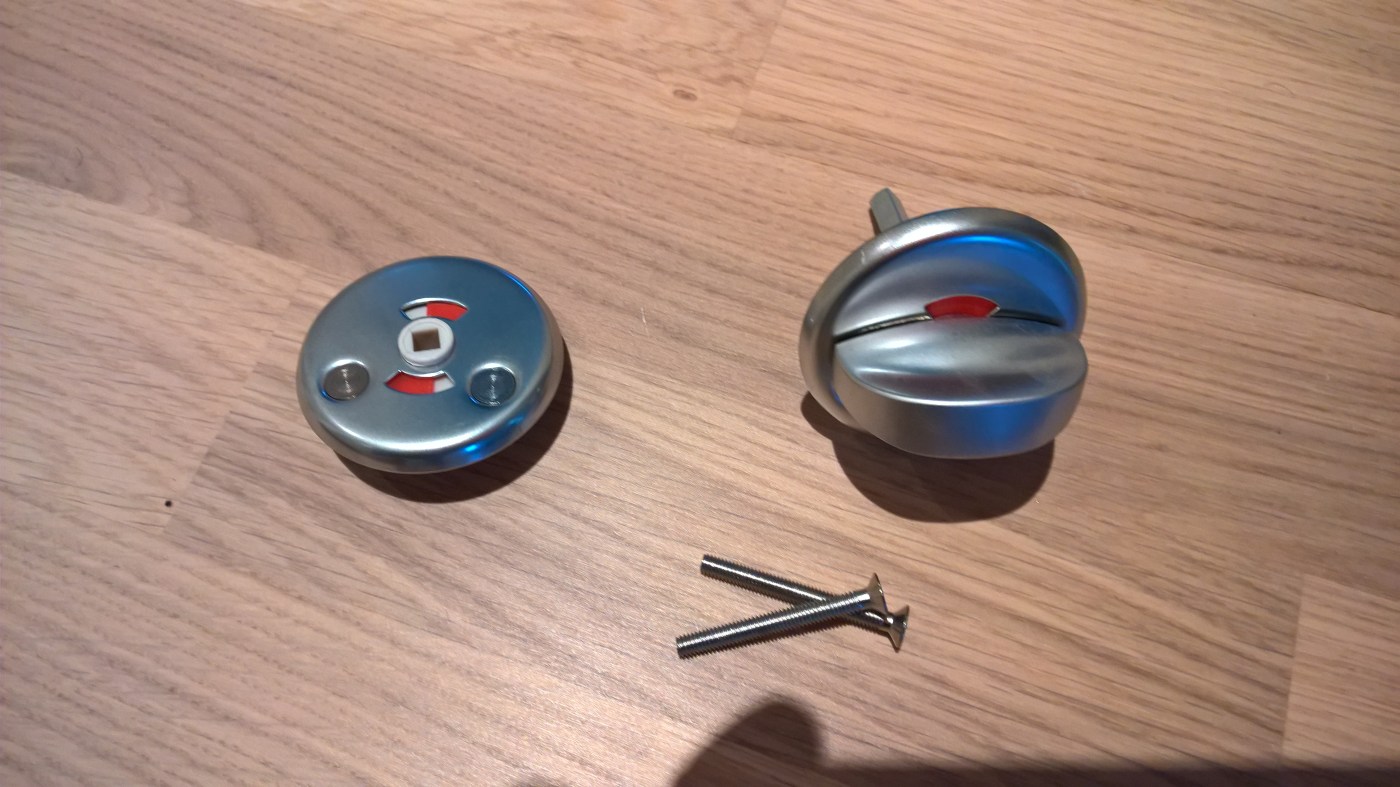
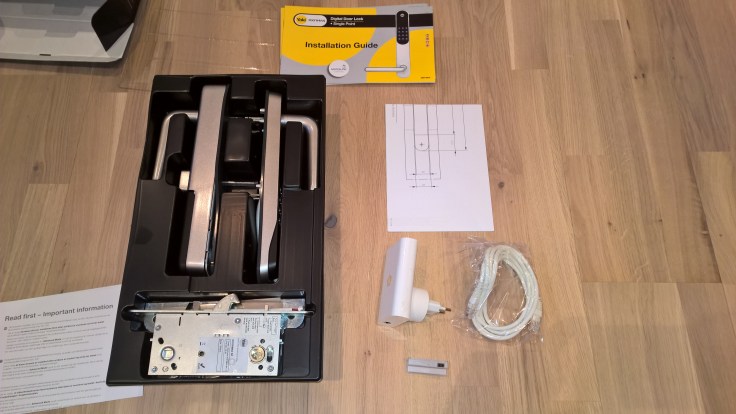
Step 1. Open the box and put everything on the floor. Some of the screws you do not need to use.
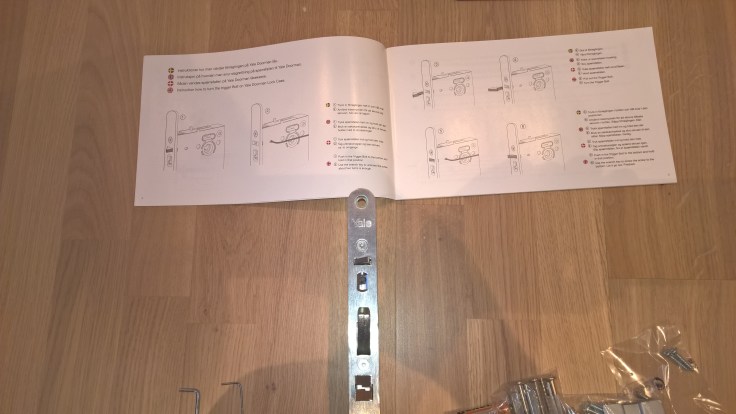
Step 2. Remove the lock and strike from the door. At this point there is no way back.
Step 3. Set on the lockbox which way the door opens.
Then start to fit the lock and drill protector into your door. Mind that you thred the cable lightly. If there are space constraints you can skip the drill protector but its not reccomended as it messes with your security. However if I was a burgular I would get in either way by other easier means.
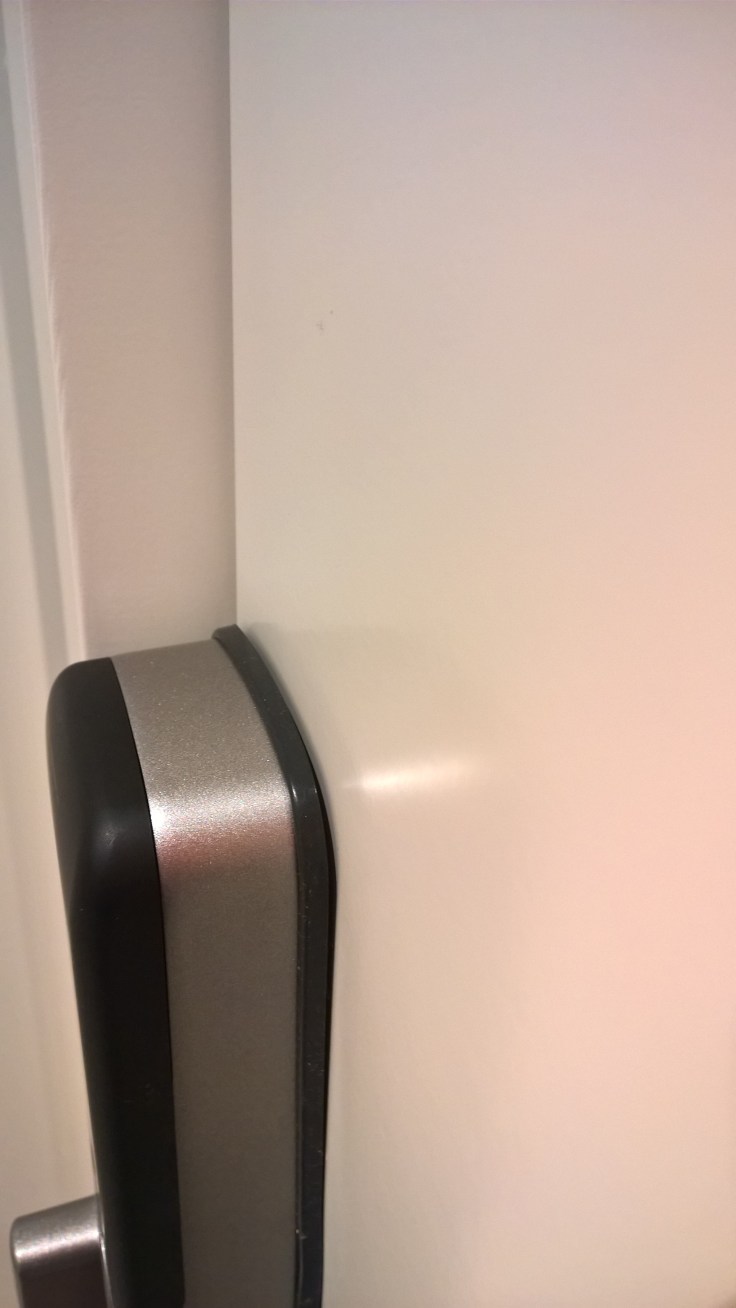
Step 4. Fit the strike. Here I ran into the first problem. You might have to adjust the strike some millimeters outwards in order to get a perfect fit. I had to ofset the strike about 1-2mm in order for the door to close and lock automatically.
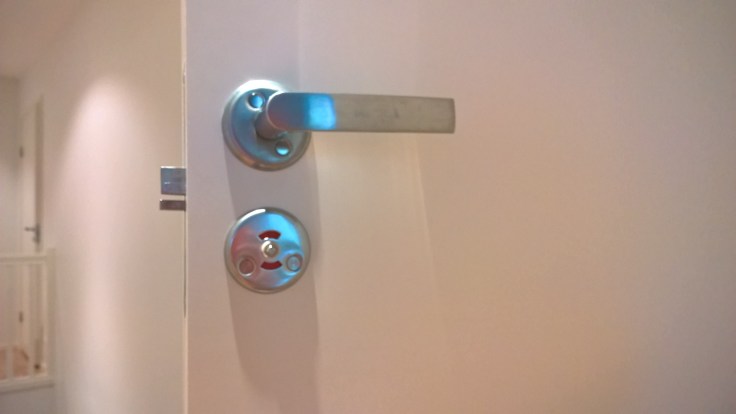
Step 5. Decide which way the door opens on the Yale Doorman and fastend the screws on the yale doorman door hinge.
Step 6. Set your Yale Doorman to ADVANCED if you are using Verisure or integration. In easy mode integration will not work.
Step 7. Fit the outiside panel and thred the cable. Here I ran into the second major problem. The outside panel did not fit in the top hole. The hole was ofset a bit north by 2-4mm. Here I had to use a hammer and chisle to carve out the circle more oval. You make cosmetic damages to the door but it is not visible behind the doorman.
Step 8. (This step was the hardest) Place the inside panel and cut + fit the screws that hold the doorman in place. This was for me extremly hard to do as you need to cut the right lenght, test it and then unscrew and cut some more. it is very hard to hold the lock and thred the screw at the same time. I suggest that you use a helper at this point. Also do not cut to much as you are not given any extra screws. You can feel when the screw has been inserted fully and it is very visible when it too long.
Step 9. Place the Yale Dorman inside lock onto the frame and make sure the lock is in Advanced mode. Just push it in place and fasten it with 4 screws.
Step 10. Fit the integration module and put in batteries.
First step once you have ordered internet is going keyless. A smart home does not have keys. For that matter I do not like to have cards or RFID chips either as you have to bring them on you.
Yale Doorman with Verisure connection allows for me to open the door remotely or with a pin. Preferably I would also have biometrics, but Verisure or Yale did not have that and only the Verisure and Yale combo gave me remote access, and a cloud portal to manage the door lock and other Verisure Devices.
The management of:
temperature,
humidity,
alarms
electrical outlets
fHaving this far outweighted the need of having a standalone lock with biometrics.
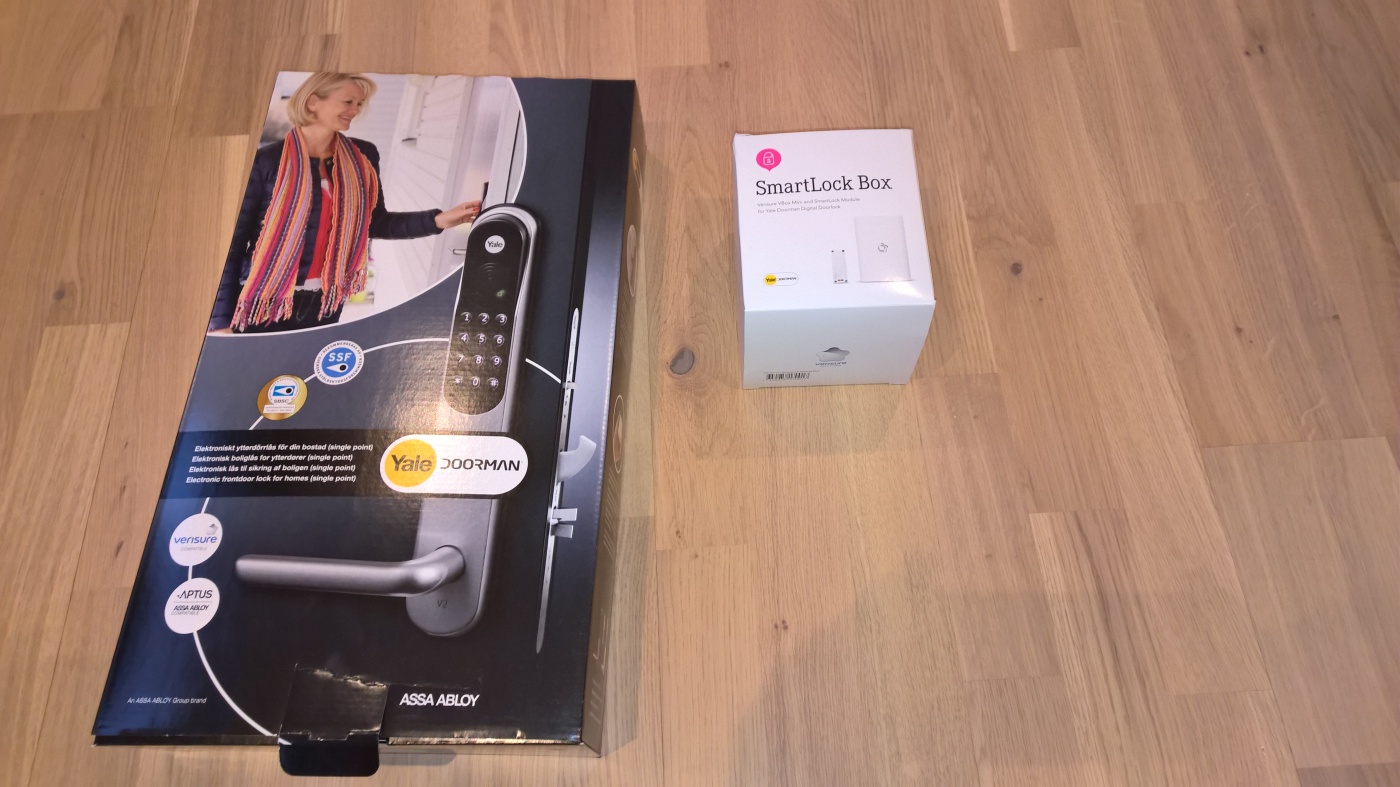
I got the lock and verisure chip from ShopLink for only 3649,- NOK. A fair price.
Mounting the lock and using the cloud connection to Verisure will follow later.


You must be logged in to post a comment.