Search

Håvard Siegel Haukeberg

Paste life: Ctrl+C -> Ctrl+V

Category

Enterprise Mobility Suite

Adding a Success Plan Owner to Fasttrack

In order to be eligible for the adoption funds you need to have a success plan owner on your success plan and that owner need to be from the customer email-domain.

Here is how you as a PARTNER can do it:

1
Find the success plan and make sure it is all 100%
2
Click on 1. Business Case and wait for page to load. Then click teams


3
Make sure you have these roles


4
If you are missing Success Plan Owner , click add and add him.


5
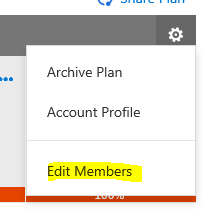
Now go back up to the success plan and click the gear icon and Edit members


6
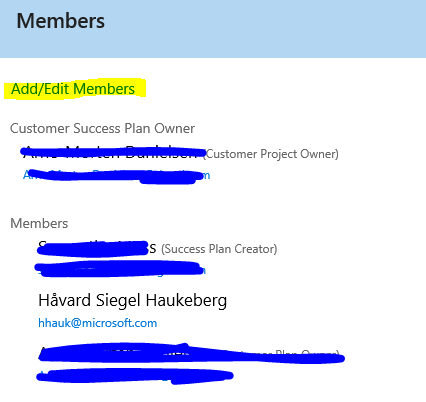
If you do not see a customer plan owner click add/edit members


7
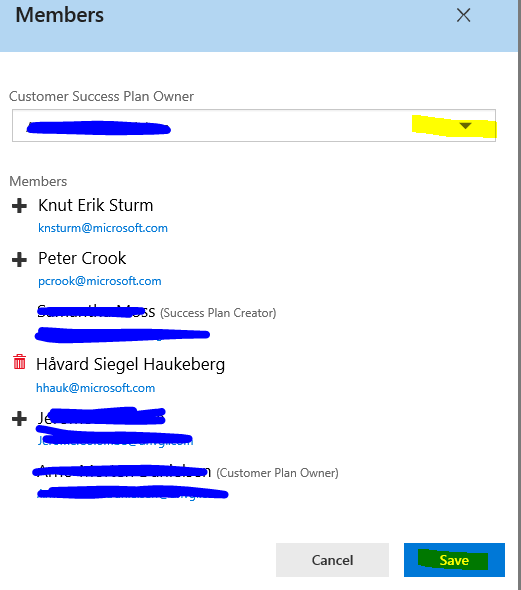
Select the customer owner from the drop down list


8
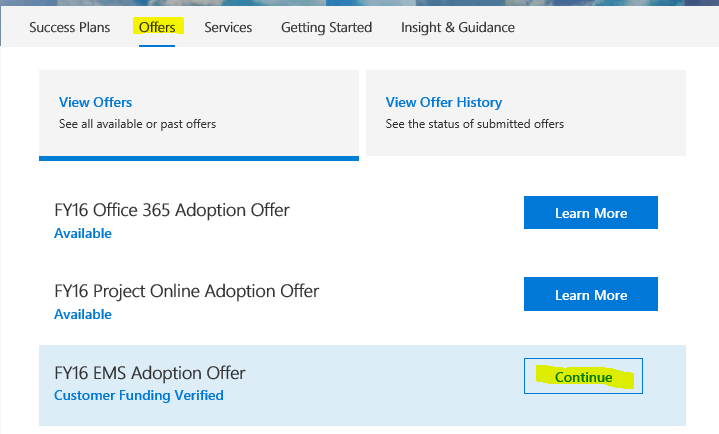
Now you are ready to submit your offer request. Click on Offers and continue or “Learn more”


9
Associate the success plan which now has a owner


10
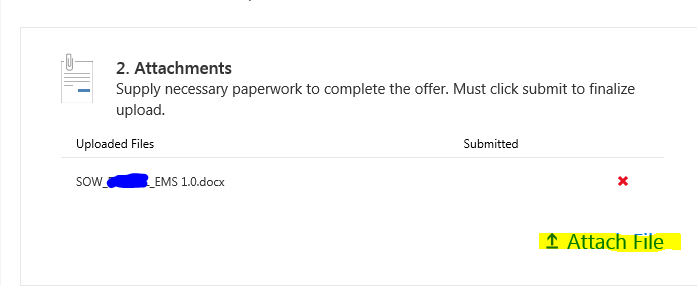
Attach any aditional files and click submit.


Customer Success Plan Owner now has to approve the project in the fasttrack portal.

Easy way to claim Fasttrack adoption funding

  1. http://fasttrack.microsoft.com
  2. Click Log In in top right corner
  3. Click the Sign in button again and Sign in with your Office 365/Azure AD account (you must have this)
  4. Wait for the site to load all the menus, takes some seconds
  5. Click “Search for a customer

    search for custoemr
    Search for a customer
  6. Then seach for the customer name. Green ball means that Fasttrack center is engaged, red pyramid means that we have not engaged the customersearch results
  7. Click the customer and click “Add me
  8. Now click on Offers and find the “FY16 EMS Adoption Offer” and click “Learn more
  9. If you have the competency to claim funds then click “Create Request” and start to fill out.

Deploy Office 365 MSI with Microsoft Intune

I have wrapped a EXE file (OfficeProPlus click 2 run)  in a MSI wrapper. I have used a Certificate and signed the MSI and now I am going to use Microsoft Intune to push out the installation on PC’s.

Go to manage.microsoft.com and click Apps->Select Apps->Click Add an App

Launch the software wizard and log on.

windows MDM installer beskrivelse

os krav

kommandoargumenter

summary
Click Upload and then wait


distribute
Select the software you want to distribute


admin
These users in this group will get this software


forced install
It will be forced to the device


asap
As soon as possible


group
These are the users in that group which will get this software

How to sign a MSI file for deployment with Microsoft Intune

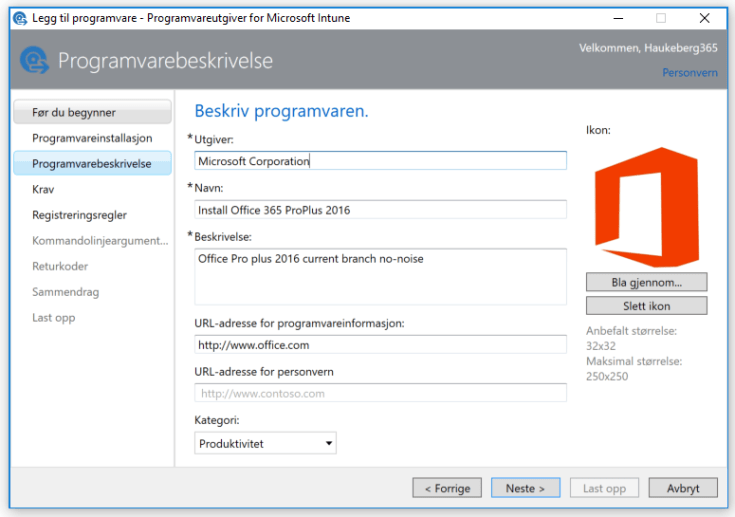
If you want to use Microsoft Intune to deploy a MSI file it needs to be signed by a Code Signing Certificate. Most MSI’s from software vendors are signed already, but if you created a custom MSI (e.g. Office 365) by wrapping an EXE then you need to sign that MSI.

Using a MSI will enable Intune to push that software using the MDM channel. All MDM joined PC’s will be able to recieve this software.

Scenario this covers: I want to use Microsoft Intune to deploy apps and exe files to PC’s e.g. Office 2016/Custom Software

Step 1 – Buy or get a code certificate. If you do not have it, buy it here: https://www.digicert.com/code-signing/

Step 2 – Download and Install Windows 7 SDK to get the signtool.exe get the SDK from here: https://www.microsoft.com/en-us/download/confirmation.aspx?id=8279
->Accept all defaults and do not change anything. It will prompt errors
->Check that you have the signtool.exe in this folder:
C:\Program Files\Microsoft SDKs\Windows\v7.1\Bin

Step 3 – Get your certificate exported in a PXF file. and put it in the same folder as your MSI file.

Step 4 – Run CMD as administrator and input this command:
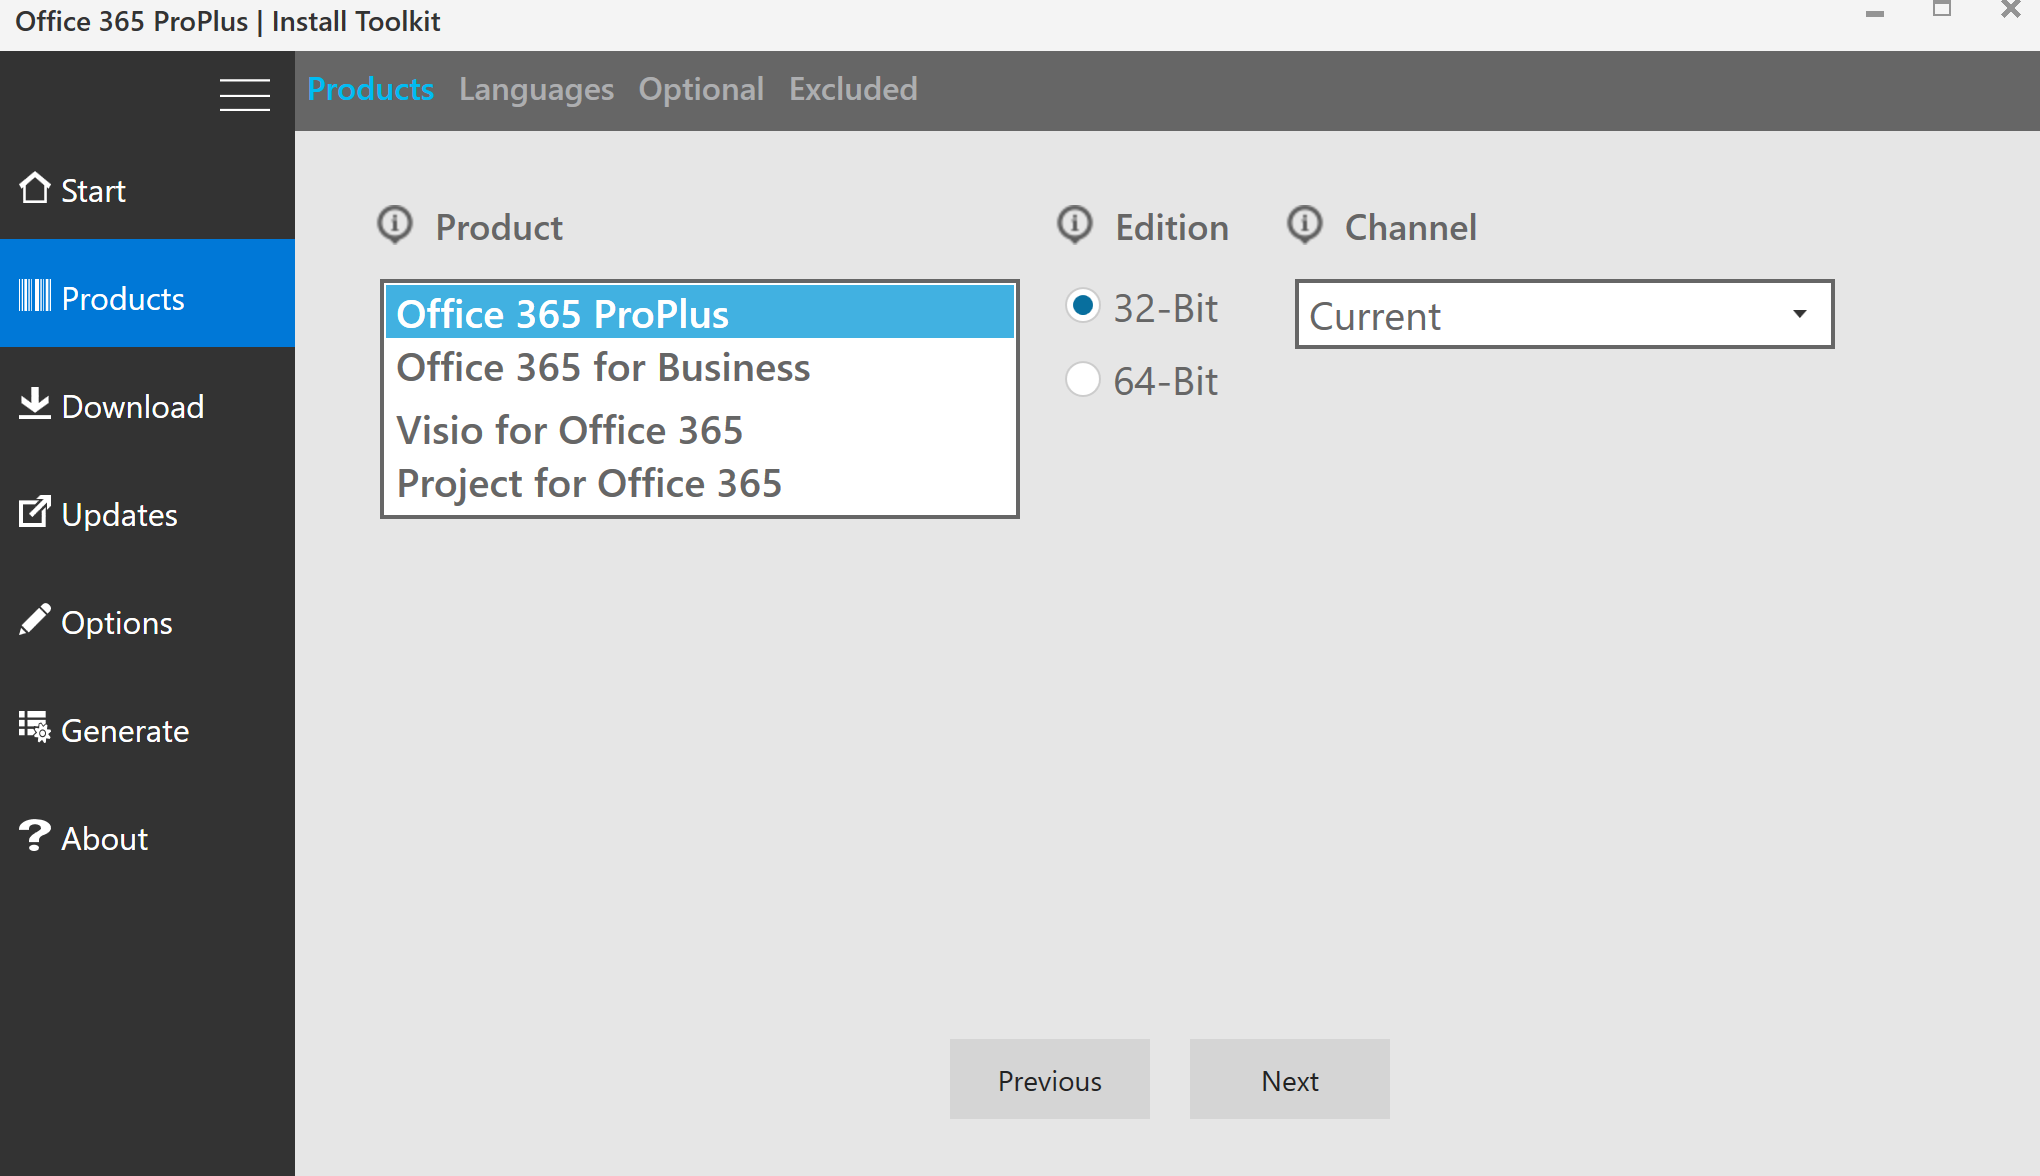
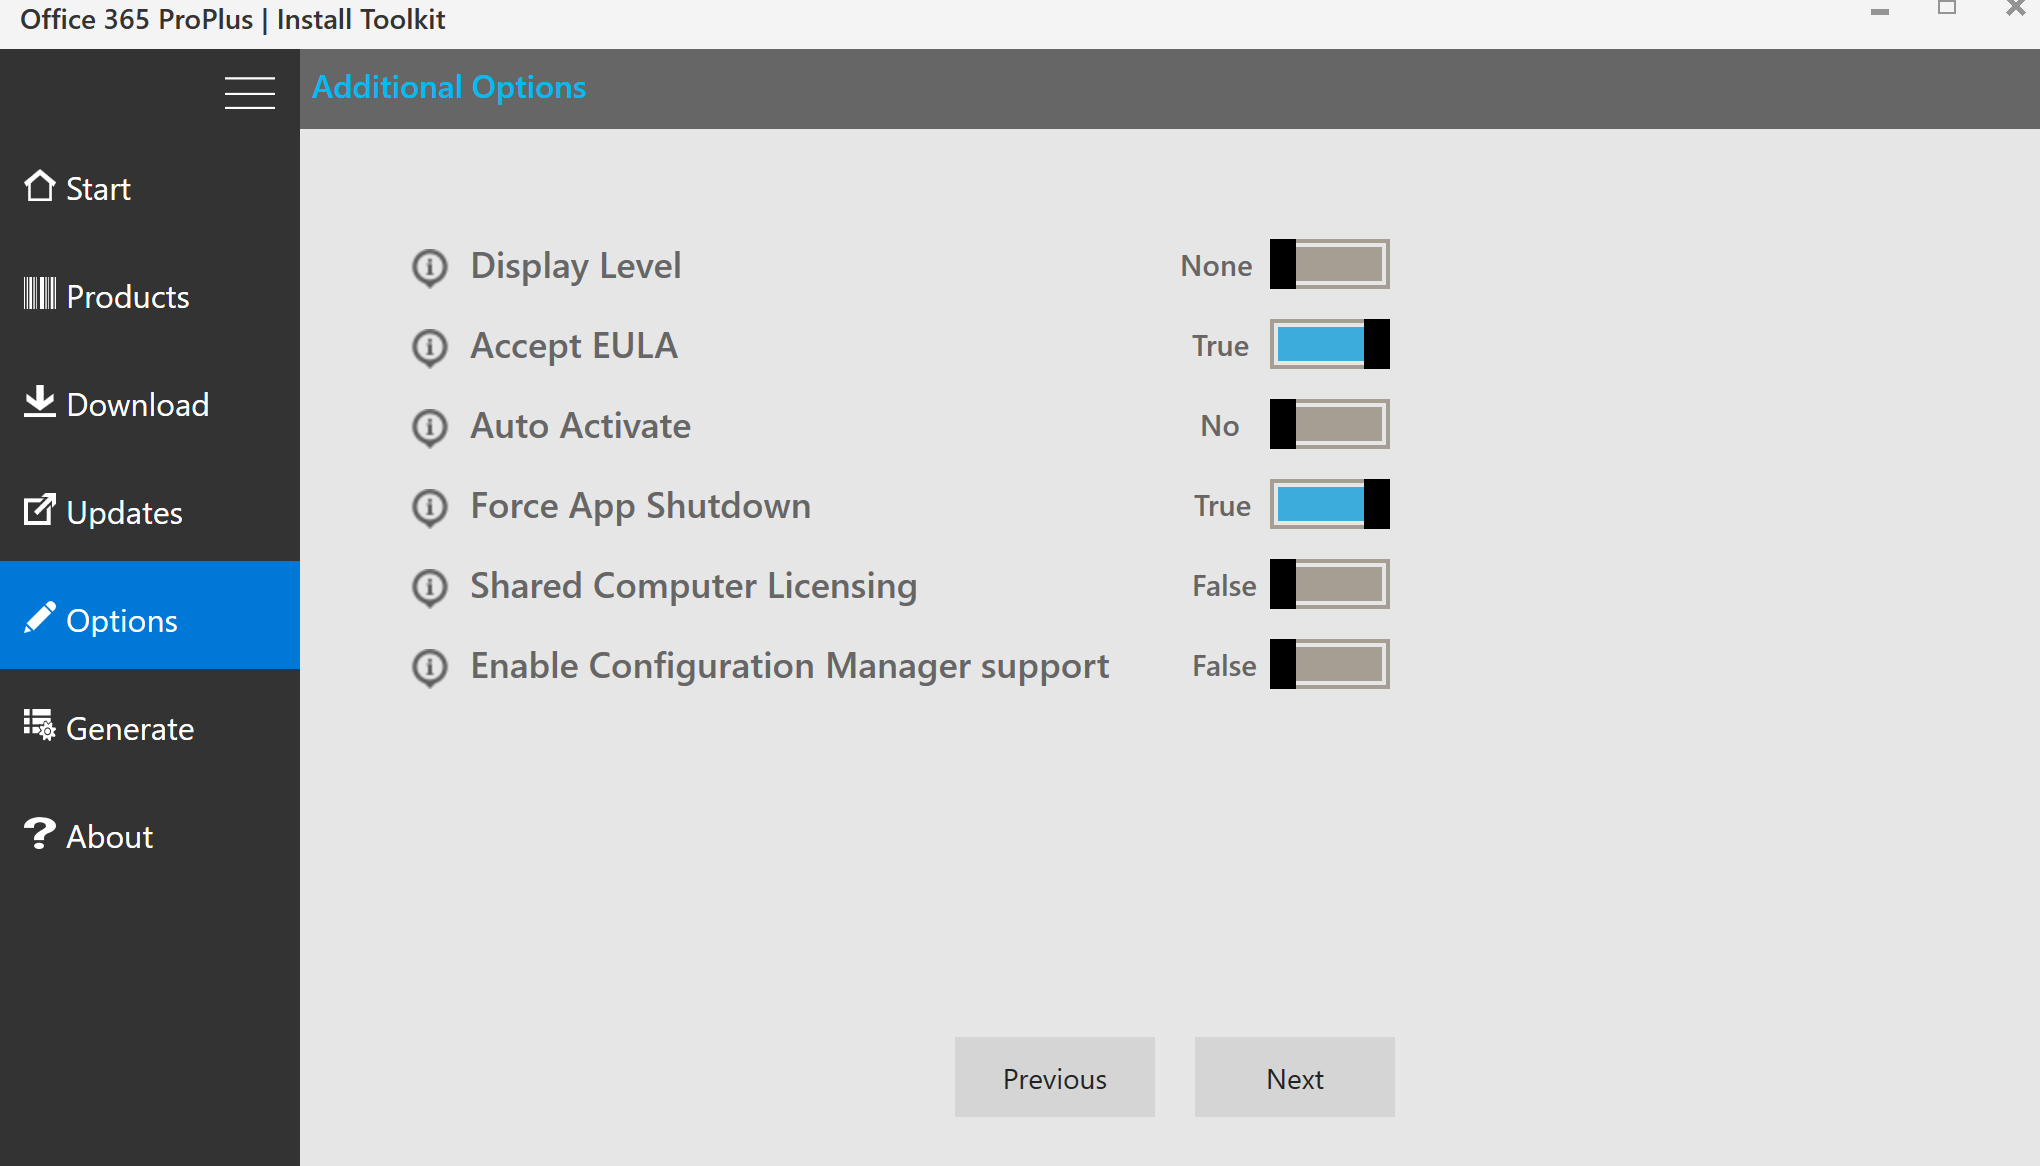
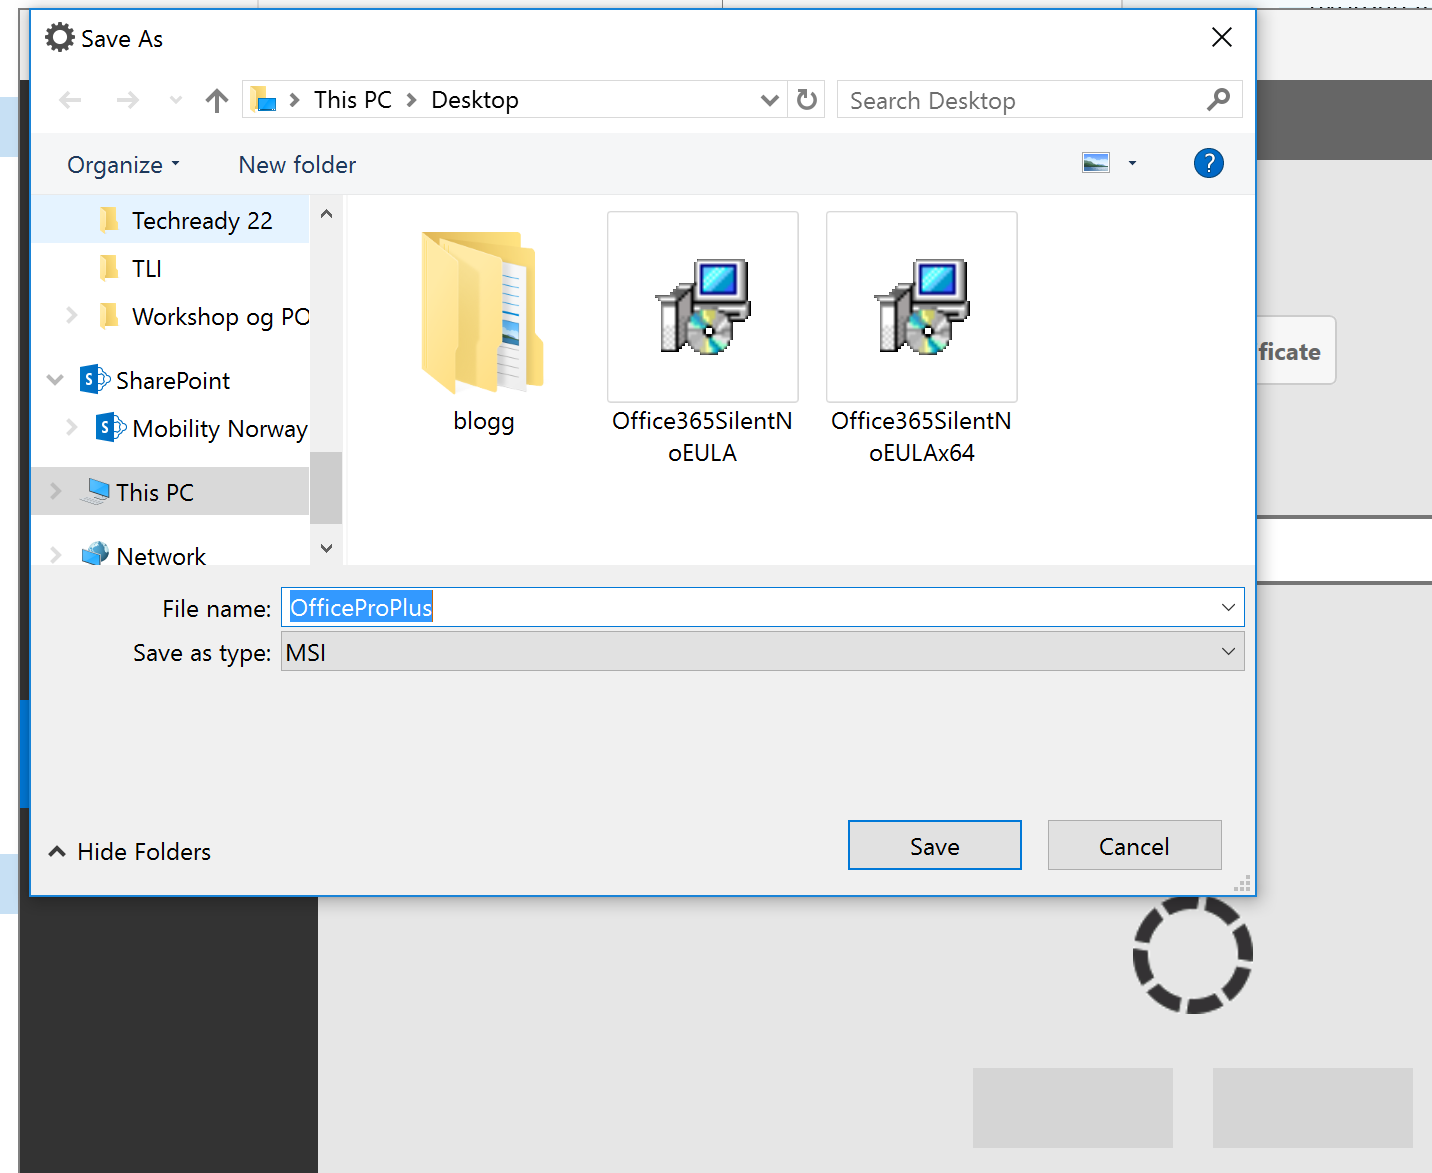
“C:\Program Files\Microsoft SDKs\Windows\v7.1\Bin\signtool.exe” sign /v /f “c:\exemsi\HaukebergCert.pfx” /p “PASSWORD” /t http://timestamp.digicert.com /v “C:\exemsi\OfficeProPlus.msi

sign ok
The password has been removed


Now you are ready to deploy this MSI file through the MDM channel

Follow this guide to deploy the MSI file in Microsoft Intune MDM channel


IT DEV Connections
We are covering MDM channel here

Adapted from these posts:
http://www.identityfinder.com/kb/Enterprise-Documentation/823571
https://www.digicert.com/code-signing/signcode-signtool-command-line.htm

Convert Office 2016/365 click to run into a MSI

*UPDATED with new screenshots of Office 365 generator

You can use this free tool to create a Office 365/2016 MSI in order to deploy it with Microsoft Intune.

https://officedev.github.io/Office-IT-Pro-Deployment-Scripts/XmlEditor.html

Office 365 install generator
Click Install Generator
launch
Launch it and install it
Start New
Click Start New
2
Select 32 bit if a fresh install, if you have 32 bit installed you can not select 64 bit.
3
Feel free to add a lanugage
5
Just click Next
6
Remove stuff you do not want
7
Ensure you have the right edition or mabye you want to add 64 bit?
8
Of course you want automatic updates. Click next
9
Make it real silent. Don’t do Auto Activate
10
NEW: Self signing certificate. Remember to check and generate. If you do not do this there will be a UAC prompt
11
Could be anything
12
Give it a name and click save


You can manually sign the MSI

Or simply Deploy it to Microsoft Intune using the MDM channel.

Deploy Office 2016 ProPlus from Office 365 with Microsoft Intune

You can use Microsoft Intune agent to distribute and deploy quietly Office 2016 ProPlus bits to any Windows PC you manage with the agent.

Here is what you do:

  1. Download the Office Deployment Toolkit https://www.microsoft.com/en-us/download/details.aspx?id=49117
  2. Install it and you get two files. Setup.exe and Configuration.xml
  3. Configure the configure.xml with something like this:
    • <Configuration>
        <Add OfficeClientEdition="32" Branch="Current">
          <Product ID="O365ProPlusRetail">
            <Language ID="en-us" />
          </Product>
        </Add>
      <Display Level="None" AcceptEULA="True" />
      </Configuration>
  4. Upload the exe file and select to include other files in the folder.
  5. Add the command line argument to /configure configuration.xml
  6. Deploy the software to the target groups.
  7. Make sure that your computer is in that target group
  8. Wait for Office to Install
Magic will happen on the client device. It must be logged in as an Administrator for this to work.
9
get all files
1012
wifi acitivty system
Under installation the wifi starts working in the background
Resource manager office click to run
You can see that Office Click to Run is going in the background.


Extending an Intune, EMS or Office 365 Trial

Need more time to decide?

Thats okay, if your trial is about to run out simply:

  1. Log on to http://portal.office.com  as an Administrator
  2. Navigate to: Billing->Subscriptions
  3. Find the trial you want to extend and click it
  4. Click Extend and enter a credit card. (It will not be charged)
  5. Click Submit

That’s it, 30 more days

subscriptions

ems licenses extend trial


Deploy custom script with Microsoft Intune

Once you have:

  1. Created a script
  2. Packaged the script in an EXE

you should be ready to deploly that script to computers running the Microsoft Intune Management Agent. The Intune MDM channel does not support EXE, only MSI.
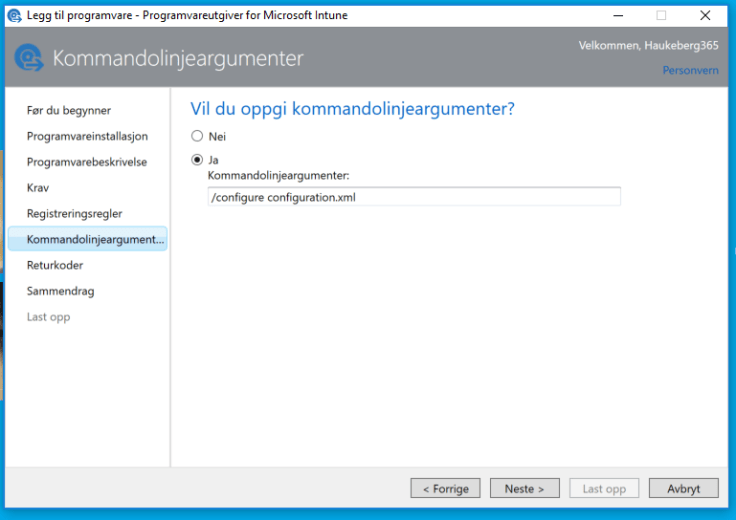
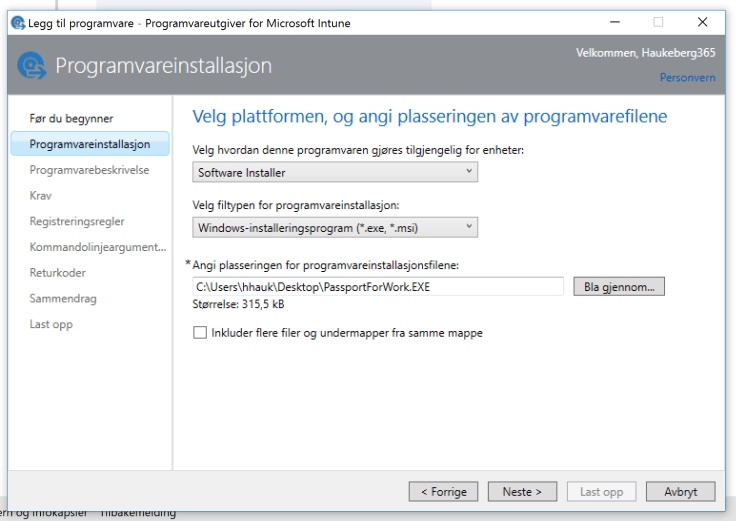
1
Log into Intune and go to Apps
2
Select Software Installer and select EXE then browse for the EXE

Follow the Wizard.

3
You are done. Now you need to move the user or PC into that group for deployment. Deploy to all PC’s? apply to all computers instead of a group.
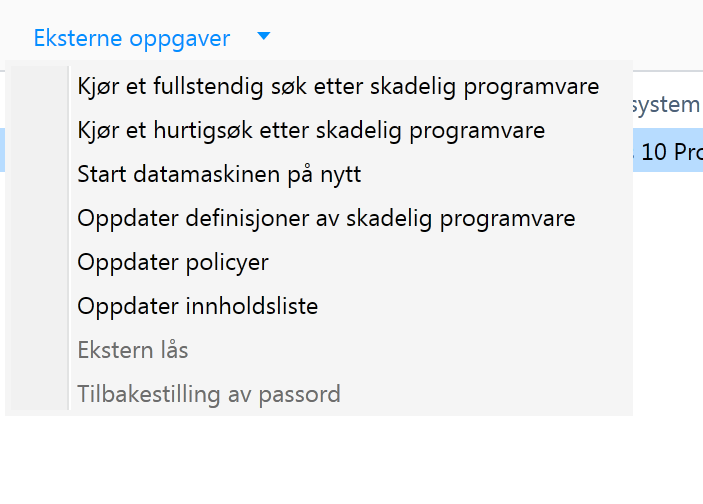
7

8


3
Venter på å kjøre script
6
Manuelle oppgaver som kan gjøres på klienten


Create a GPO Script for Microsoft Intune

Microsoft Intune can not push out Group Policies onto computers, but we can target users or devices with scripts that change that setting in the registry.

Here is how you create a simple script that does just that.

@Echo off
echo A Script to set a Registry value using Windows Intune
REM registry key
reg add HKLM\Software\Policies\Microsoft\PassportForWork /f
reg add HKLM\Software\Policies\Microsoft\PassportForWork\ /v Enabled /t REG_DWORD /d 0 /f
if errorlevel 1 (
echo Error installing reg key
exit /b 1
) else (
echo Installed regkey
)
exit /b 0


Simply copy this script into a notepad file and then save it as PassportForWork.CMD right click and Run as Administrator to input the software policy where we set Passport for Work enabled as = 0 “Turn Off”

You can enter some of these register values:

REG_BINARY
REG_DWORD
REG_EXPAND_SZ
REG_LINK
REG_MULTI_SZ

Read more here: Registry Values (Technet)


Thanks to Richard Harrison at http://www.cableplugger.com/2013/03/adding-windows-registry-entry-with.html

Blog at WordPress.com.

Up ↑