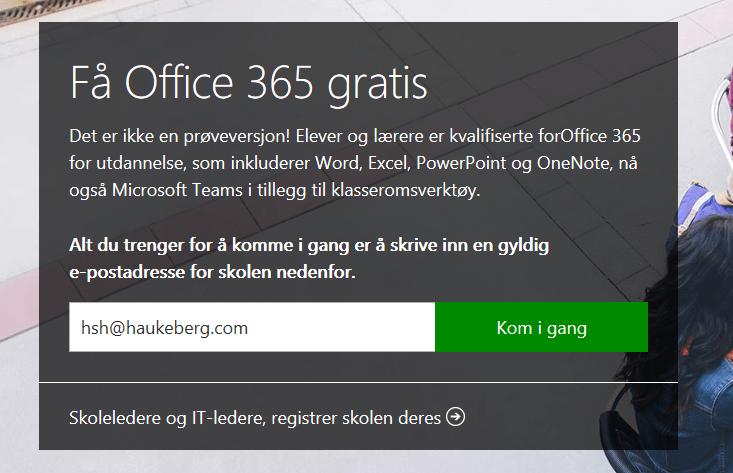
Search

Håvard Siegel Haukeberg

Paste life: Ctrl+C -> Ctrl+V

Tag

Education

Education Licenses and Administration Licenses on same tenant

Hey, are you a municipality, county or another complex organization? Do you have education users and corporate users and want all of them to be in the same Azure AD?

Good news for you. It’s possible!

edu and corp
And I have here Both E3 and Education (E1) for students.

Here is how you do it.

  1. You do not have Office 365/EMS or Azure AD

    • Create a EDUCATION trial here: NORWEGIAN TRIAL ENGLISH TRIAL
    • Add your education domain to verify EDU status
    • Buy EDU Licenses and The CORP licenses should also be in the same list under “Purchase Services”
  2. You have a CORP tenant that you need EDU licenses on.

    • Email your License supplier hand have them reach out to your local Microsoft Education Team.
    • The local MSFT EDU team can tag your tenant as EDU. YOu need to provide them with your tenant name: e.g. MYTENANT.onmicrosoft.com
    • Wait 48 hours after the MSFT EDU team has submitted the request.

Here is proof that it works:

buy
I can select between EDU and CORP plans

Limitations,risks and warnings.

  1. Risks include students having access to the entire GAL
    • Do a GAL segregation please.
  2. Volume License plans – it has not been tested and no one knows how exactly it will pan out with the agreement you have. So be warned the deployment of licenses may take a LOOOOOOONG time.
  3. You do this at your own risk at the moment and there is no guarantee it will work in the end either.
  4. This scenario works fine when you buy licenses in the portal (MOSP) shown. The problems arrive when you use a partner which sells you licenses. And that applies for most of you.

Some benefits:.

  1. Only need 1 AD with 1 Azure AD Connect
  2. 1 ADFS environment
  3. 1 portal
  4. 1 GAL or Two 🙂


Windows 10 bootable USB Stick with UEFI support

Windows-10-Logo


How to make a Windows 10 Bootable USB stick that support UEFI boot.

Requirements:

  • 4 Gb USB stick/flash drive
  • Windows 10 Pro/Enterprise/Education Installation files (either their own image, MSDN or from the Volume Licensing website)
  • A PC or tablet!
Make a bootable USB flash drive using DISKPARTRun CMD.EXE as an administrator (Win-X then A), then run DISKPART with the following commands (not case-sensitive):
Command What it does
LIST DISK                 Shows all mounted disks.  Find your USB flash
SELECT DISK n          Selects the disk that future commands will use.  Replace ‘n’ with the disk # for your USB flash drive.NOTE:  Be careful that you don’t select your hard disk!  The next command will wipe the selected drive clean.
CLEAN Erases all previous partition & volume information on the flash drive.
CREATE PARTITION PRIMARY    Partitions the flash drive as one partition for the whole drive.
SELECT PARTITION 1          Selects the new partition so future commands will operate on it.
ACTIVE                    Marks the new partition as active so the BIOS/UEFI can boot to it.
FORMAT FS=FAT32  QUICK        Formats the partition as FAT32.(NOT NTFS!)  EXTREMELY IMPORTANT!
ASSIGN                   Assigns a drive letter to the flash drive.
EXIT                        Exits DISKPART

At this point your USB drive is formatted.  DO NOT format the drive with Windows Explorer or format.com; you will not be able to boot from it.

Simply Copy files to the USB Drive and Prep the Windows 10 Image on the USB drive.

1. Copy Files

  • Use File Explorer

or

  • Copy files using (use XCOPY or ROBOCOPY) both of which are available in Windows 7/8/10.robocopy <source directory> <usb flash drive root directory> /mir
  • Example:  robocopy d:\Win10Files e:\ /mir
    (Change the destination to the folder that you have extracted Windows image on disk)

2. Prep the USB using CMD

  • Run CMD
  • Go to the directory where your winfiles are
  • cd boot (e.g. c:\win10pro\boot\)
    bootsect /nt60 X: (X is the drive latter of your USB drive )


Booting from the USB drive:Method 1: 

  1. Enter UEFI/BIOS Screen
  2. Set to boot from USB
  3. Disable Secure Boot

Method 2

  1. Press Windows Key + R
  2. Enter : shutdown.exe /r /o /f /t 00
  3. After the system restarts – Click boot from another device
  4. Select USB device
Install Windows 10Go through normal Windows 10
Finishing up

  • Go back into the BIOS / UEFI and re-enable secure boot
  • Run Windows Update to get latest updates
  • Congratulations! – You are running Windows 10

Blog at WordPress.com.

Up ↑

%d bloggers like this: